How To Change DNS In ROG Phone 3
You can change the DNS in your ROG Phone 3 from the advanced option of its Wi-Fi settings. You just need to set the IP Address from DHCP to static. You will then be able to access the DNS 1 and DNS 2 fields which you can change.
The best gaming phone that you can get right now is the Asus ROG Phone 3. It was first released last July and is a third generation model. This model uses the latest Snapdragon 865+ chip which is partnered with 16 GB of RAM, 512 GB of storage, a 144 Hz refresh rate AMOLED display and 6000 mAh battery. If you are an avid mobile gamer then you should consider getting this device.
Change the DNS Settings in your Asus ROG Phone
The DNS or Domain Name System act like a phonebook of the internet. Each computer connected to the internet has a numerical address. Since it’s difficult to memorize these numbers, DNS works by allowing you to connect to websites by typing its name instead of number.
When you connect your phone to a particular Wi-Fi network it will be using the default DNS that’s being used by the ISP. Sometimes this can be slow to load certain websites or can record your queries and share them with third parties. To prevent issues such as this from happening you can switch to a trusted DNS such as the public DNS of Google. Here’s how to do it.
Using Google Public DNS on your ROG Phone 3
One of the best DNS you can use in your phone is the Google Public DNS. It’s free, safe, and secure. Make sure that your phone is connected to a Wi-Fi network before proceeding with these steps.
Time needed: 5 minutes.
Using different DNS on Android phone
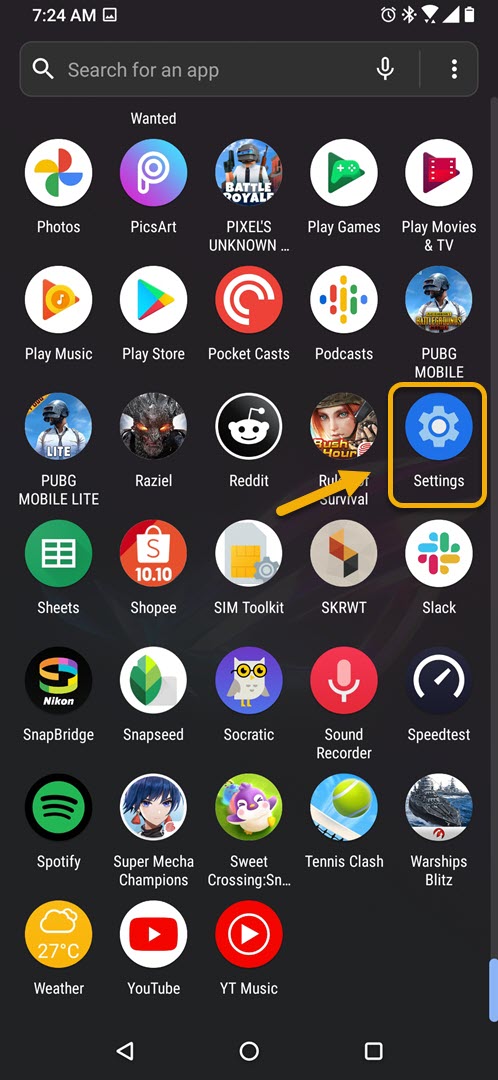
- Tap on Settings.
You can do this by swiping up from the Home screen then tapping on the Settings icon.

- Tap on Network & internet.
This is where you will be able to access your phone Wi-Fi, mobile, data usage, and SIM settings.
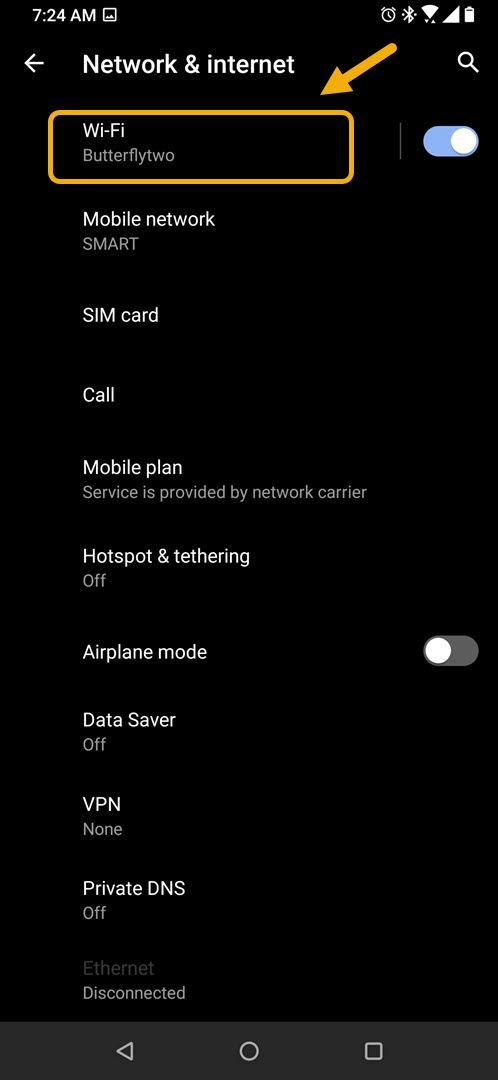
- Tap on Wi-Fi.
This is where you can access your phone Wi-Fi settings.
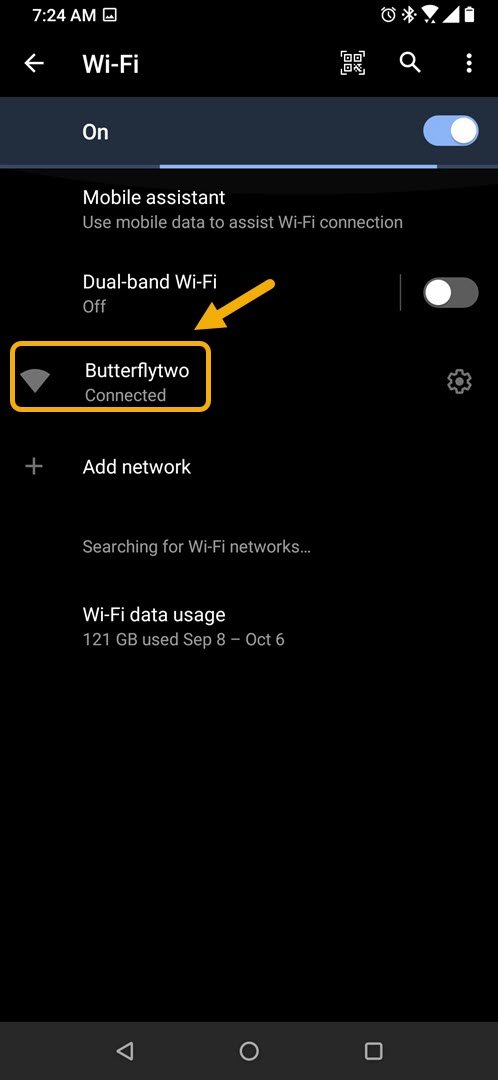
- Tap on the connected Wi-Fi network name.
This will allow you to access the Wi-Fi network settings.
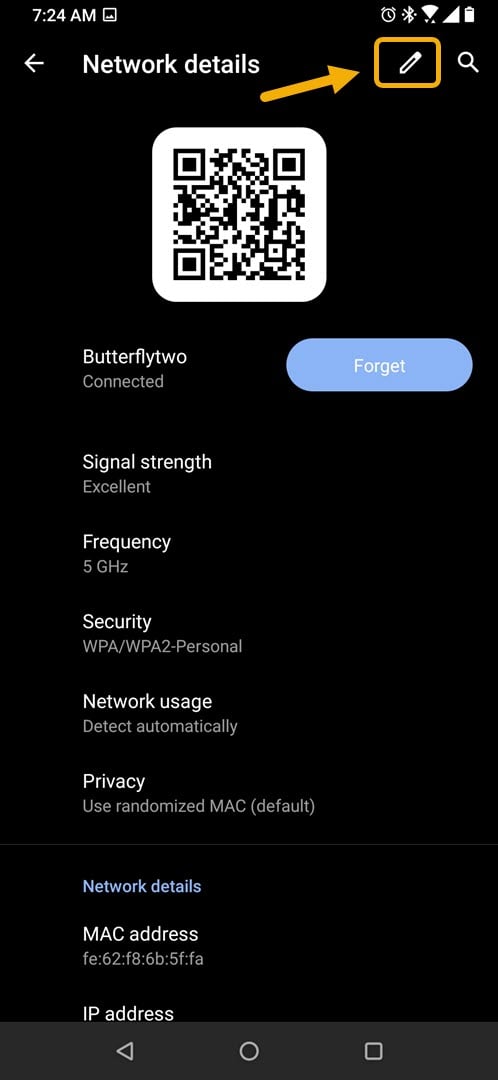
- Tap on Edit.
This is the pen icon on the top right part of the screen.
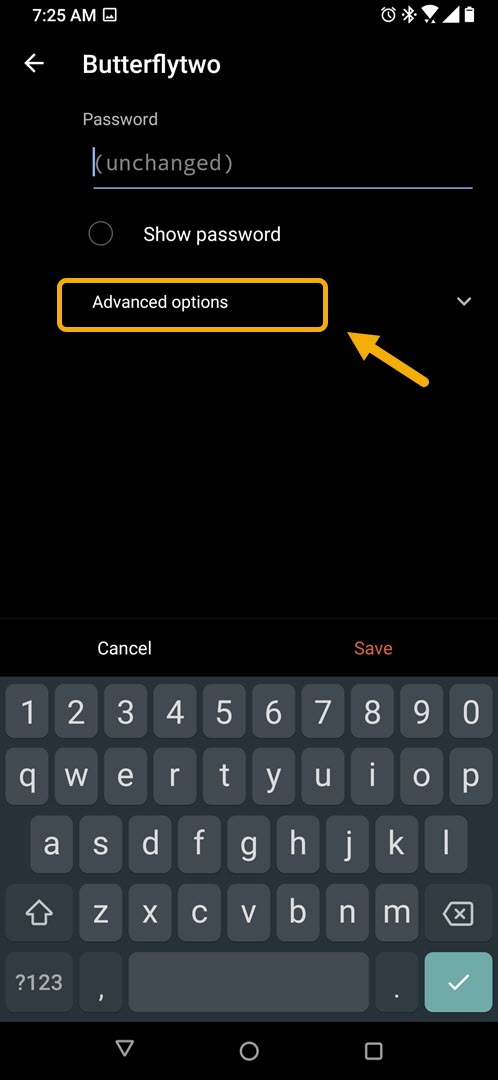
- Tap on advanced options.
This will show the advanced Wi-Fi settings.
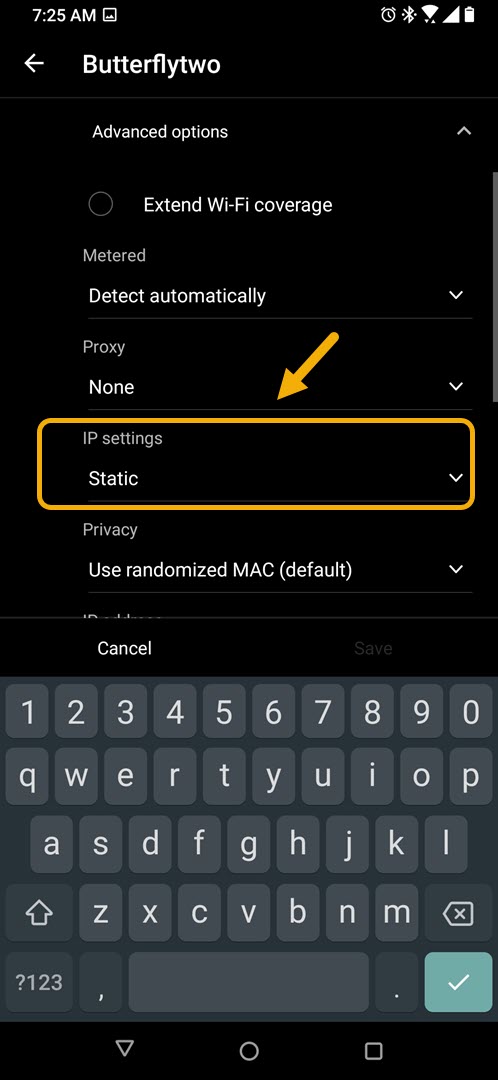
- Change IP setting from DHCP to Static.
This will allow you to access the DNS settings.
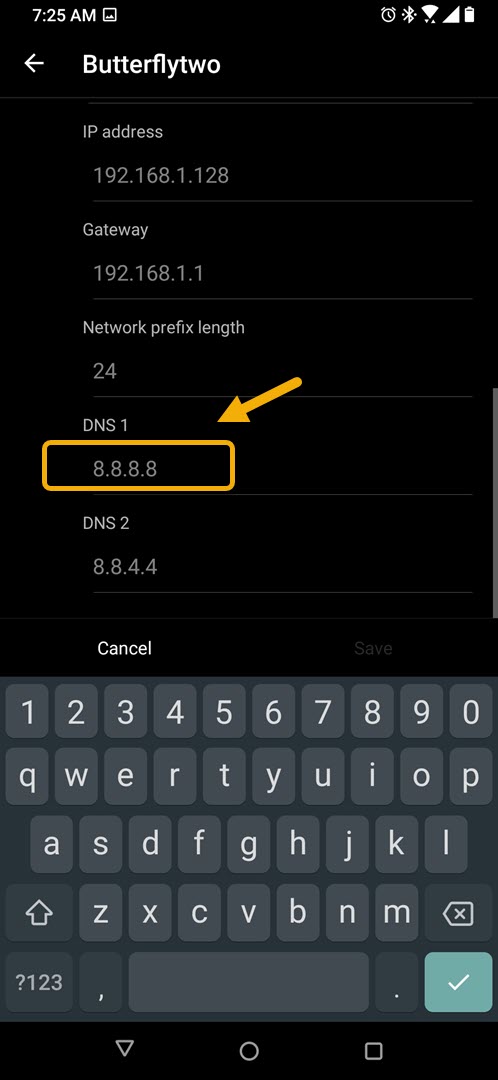
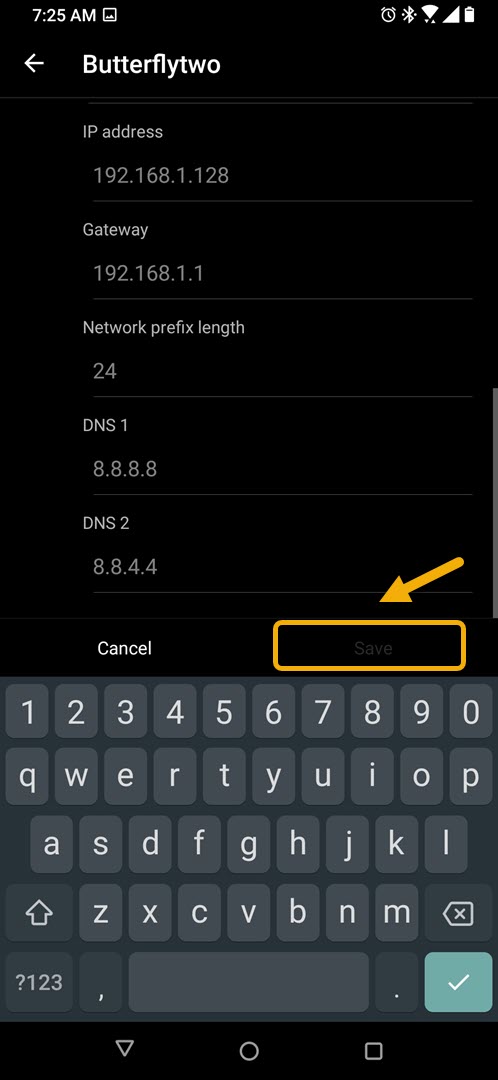
- Change DNS 1 to 8.8.8.8.
This is the primary Public DNS of Google .
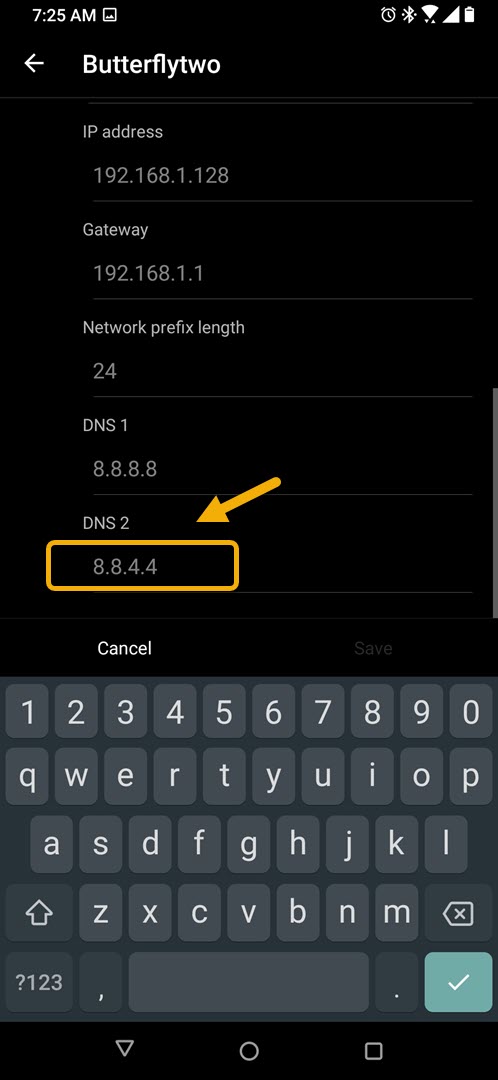
- Change DNS 2 to 8.8.4.4.
This is the secondary Public DNS of Google.
- Tap on Save.
This will save the DNS changes made on your device.

After performing the steps listed above you will successfully change the DNS in your ROG Phone 3.
Visit our TheDroidGuy Youtube Channel for more troubleshooting videos.