Why is my Galaxy Z Flip 5 Flashlight Not Working? 12 Must-Try Solutions
The flashlight feature on your Galaxy Z Flip 5 is a handy tool, but it can occasionally malfunction. This can be caused by software issues, conflicting apps, or settings that need adjustment.
If you’re facing this problem, here are 12 potential solutions to try.
Table of Contents
Common Causes of Flashlight Malfunction on Galaxy Z Flip 5
Flashlight malfunctions on the Galaxy Z Flip 5 can arise from various software-related issues, settings configurations, or, less frequently, hardware problems.
Here’s a breakdown of the most likely causes:
Software-Related Issues
- Outdated Operating System: Outdated system software can harbor bugs or compatibility problems that lead to unexpected behavior, including issues with the flashlight.
- Software Conflicts: Third-party apps, particularly those utilizing the camera, can occasionally interfere with the proper functioning of the flashlight.
- Corrupted App Data: The camera app’s stored cache and data files can become corrupted over time, potentially causing malfunctions with associated features like the flashlight.
Settings and Permissions
- Power-Saving Restrictions: Power-saving modes are designed to conserve battery life and may inadvertently limit the use of certain device features, including the flashlight.
- Insufficient Permissions: The camera app requires specific permissions to control the flashlight. Incorrect permission settings can prevent its use.
- Do Not Disturb Mode: DND modes often have granular controls that can potentially disable or restrict the flashlight’s functionality.
- Brightness Level: The flashlight’s brightness may be inadvertently set to a very low level, giving the impression that it’s not working.
Hardware-Related Issues (Less Frequent)
- Physical Damage: Accidental drops, impacts, or liquid exposure can damage the flashlight’s LED or the associated internal circuitry.
- Manufacturing Defects: Although rare, manufacturing flaws can sometimes occur, leading to a malfunctioning flashlight component.
Troubleshooting and Diagnosis
Implementing the troubleshooting steps outlined below will assist you in systematically identifying the root cause of the flashlight issue on your Galaxy Z Flip 5.
1st Solution: Check for Software Updates
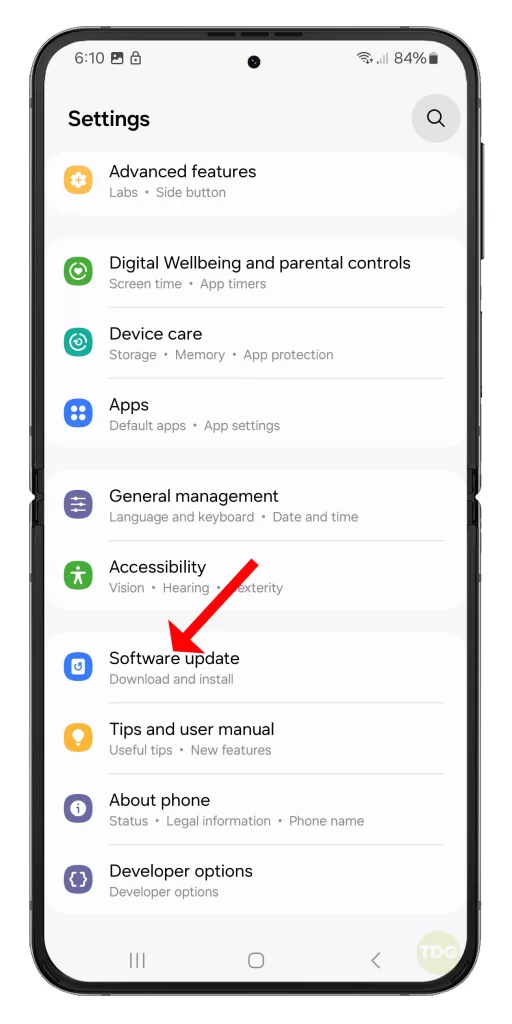
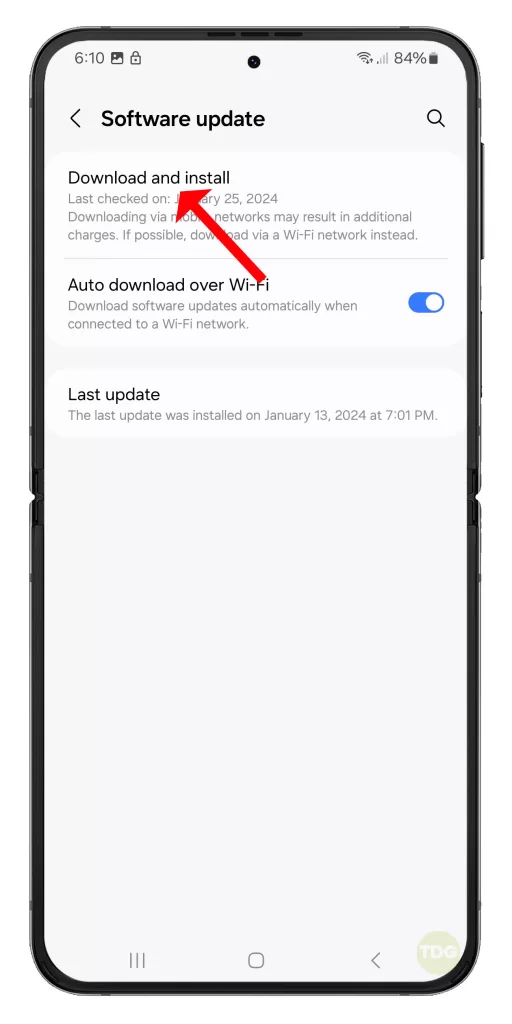
Outdated software can cause unexpected issues within your device. Here’s how to check for updates:
- Open the Settings app.
- Scroll down and select Software update.
- Tap Download and install if an update is available.
2nd Solution: Restart Your Device
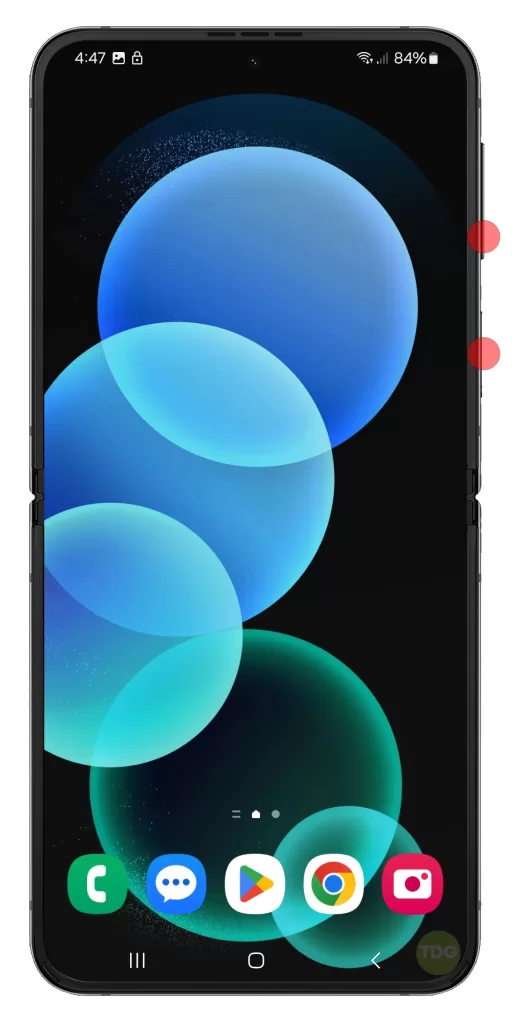
Restarting your device can often clear up temporary software glitches that might affect the flashlight. Here’s how to restart:
- Press and hold the power button and volume down button simultaneously.
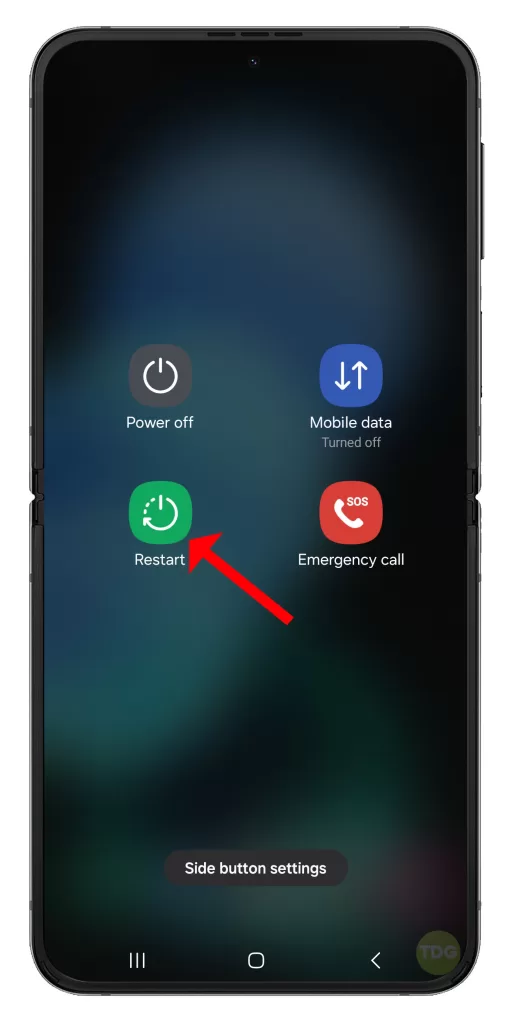
- Release the buttons when the restart menu appears.
- Select the “Restart” option.
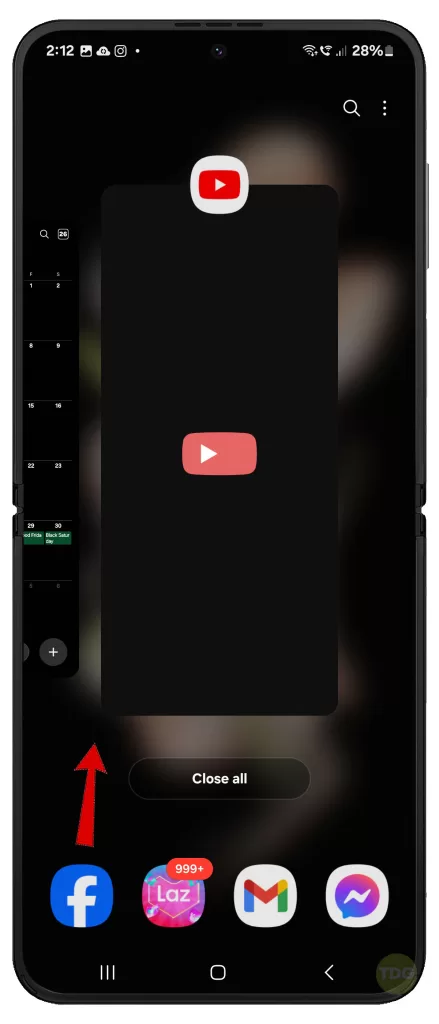
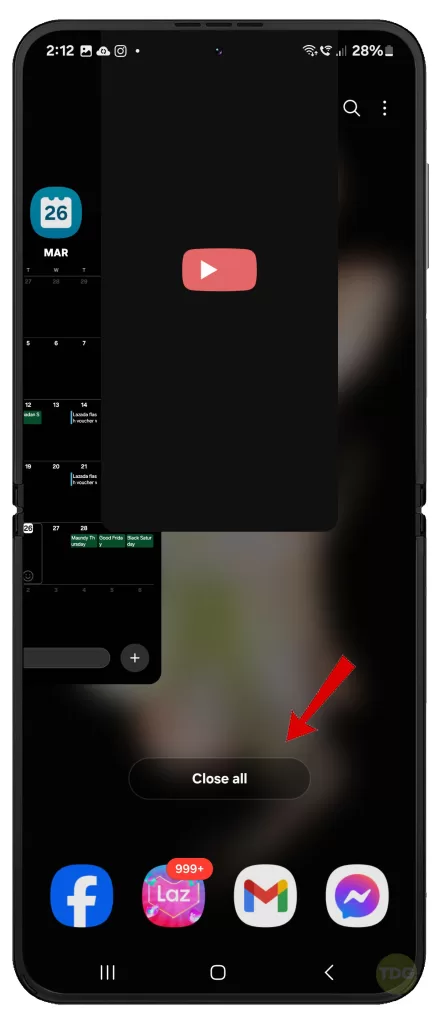
3rd Solution: Close Conflicting Apps
An app with camera access might interfere with the flashlight. Here’s how to close recent apps:
- Tap the Recent apps button (usually indicated by three vertical lines or a square).
- Swipe up on apps to close them individually, or tap Close All.
4th Solution: Disable Power Saving Mode
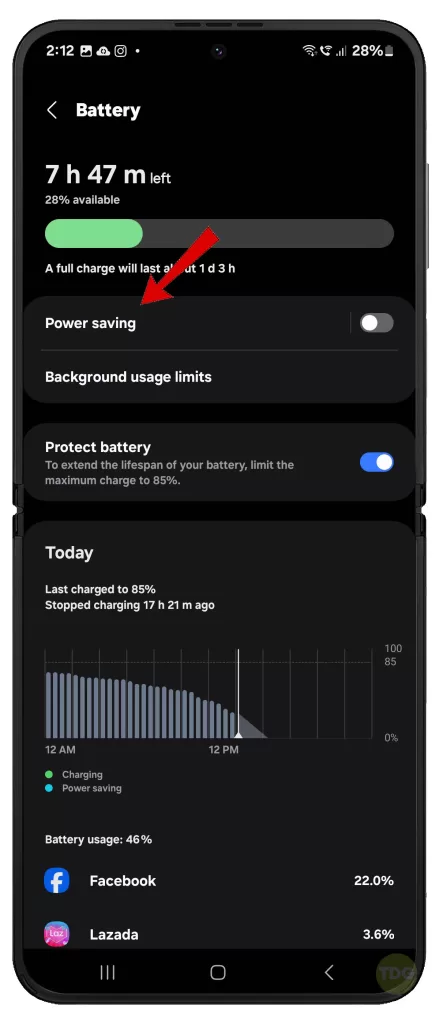
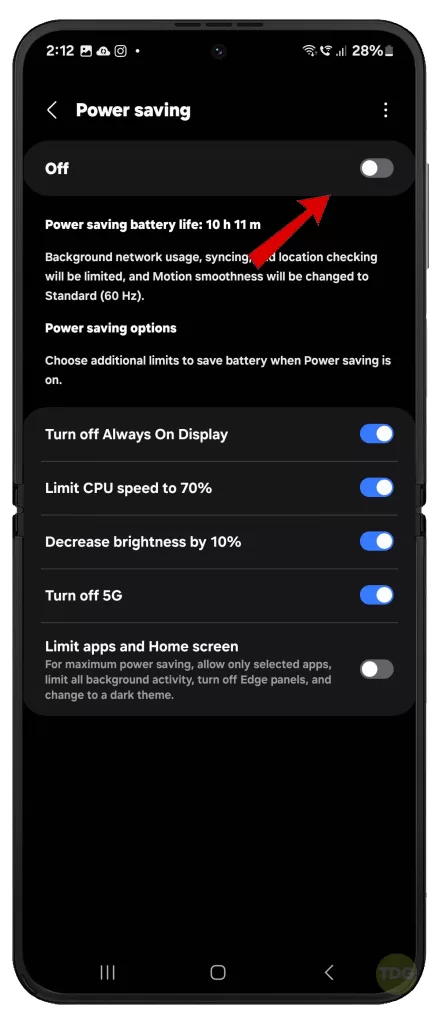
Power-saving modes can limit certain features to conserve battery. Here’s how to disable it:
- Open the Settings app.
- Tap Device Care.
- Tap Battery.
- Disable Power saving mode if it’s enabled.
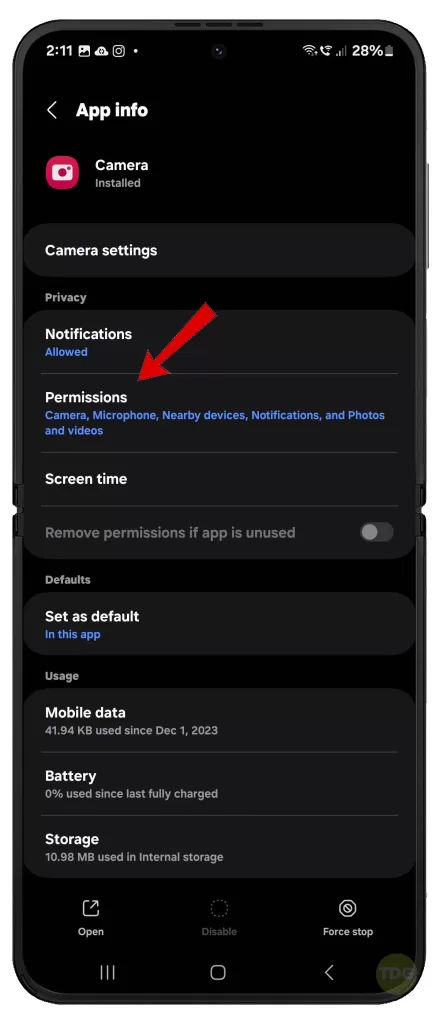
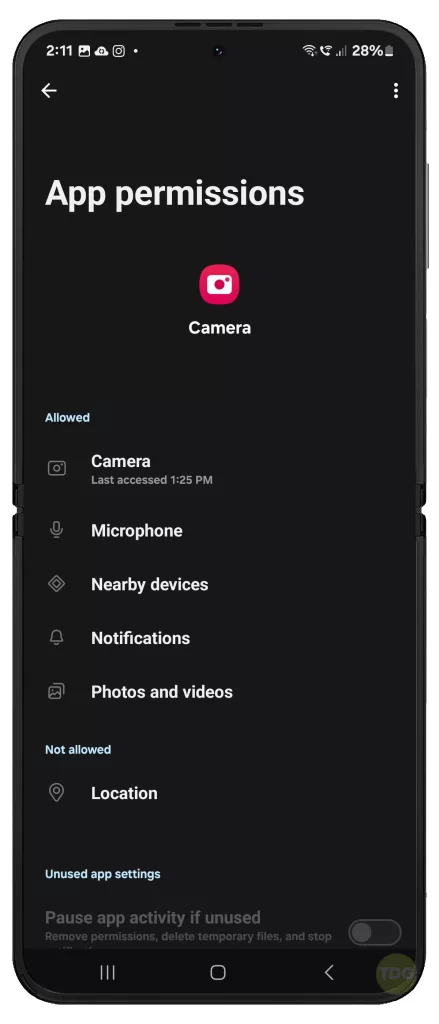
5th Solution: Check Flashlight Permissions
Your camera app needs the appropriate permission to control the flashlight. Here’s how to check:
- Open the Settings app.
- Tap Apps.
- Select the Camera app.
- Tap Permissions.
- Ensure the Camera permission is enabled.
6th Solution: Clear Camera App Cache and Data
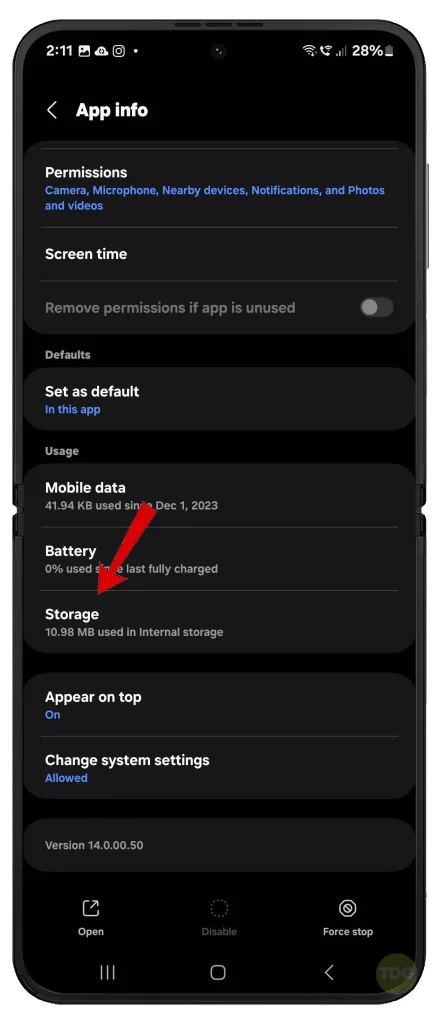
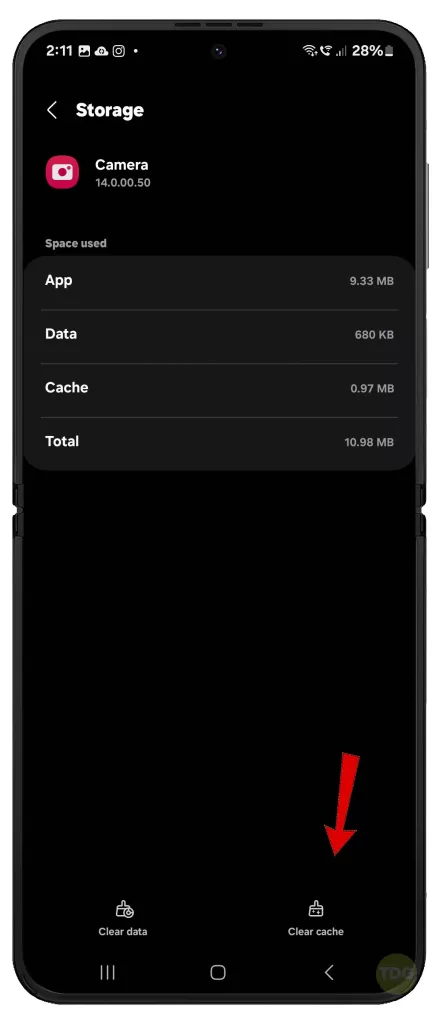
A corrupted cache or outdated app data can lead to problems. Here’s how to clear it:
- Open the Settings app.
- Tap Apps.
- Select the Camera app.
- Tap Storage.
- Tap Clear cache, then Clear data.
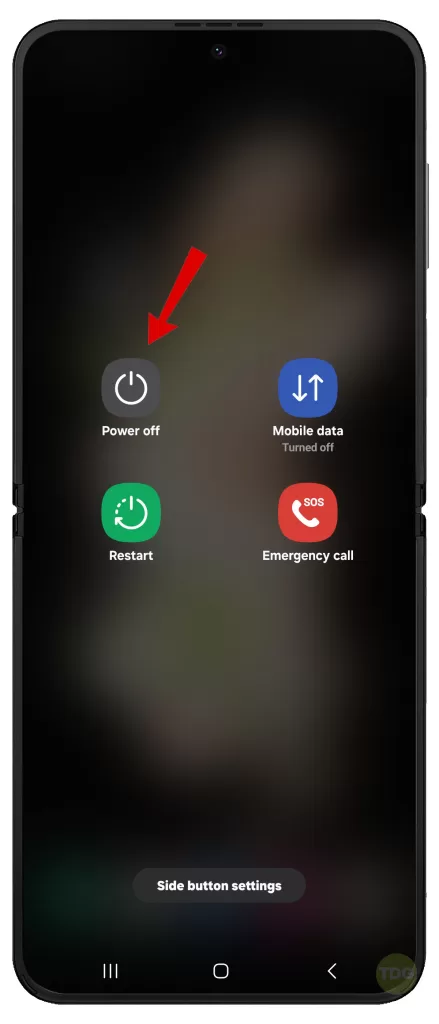
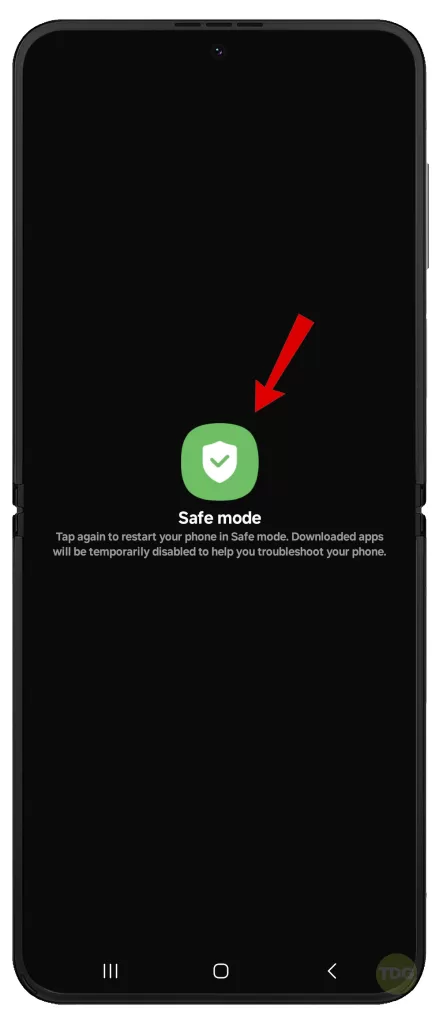
7th Solution: Test in Safe Mode
Safe mode can help determine if a third-party app is causing the problem. Here’s how to enter safe mode:
- Press and hold the Power button.
- Tap and hold the Power off icon until Safe Mode appears.
- Select Safe Mode to reboot your device.
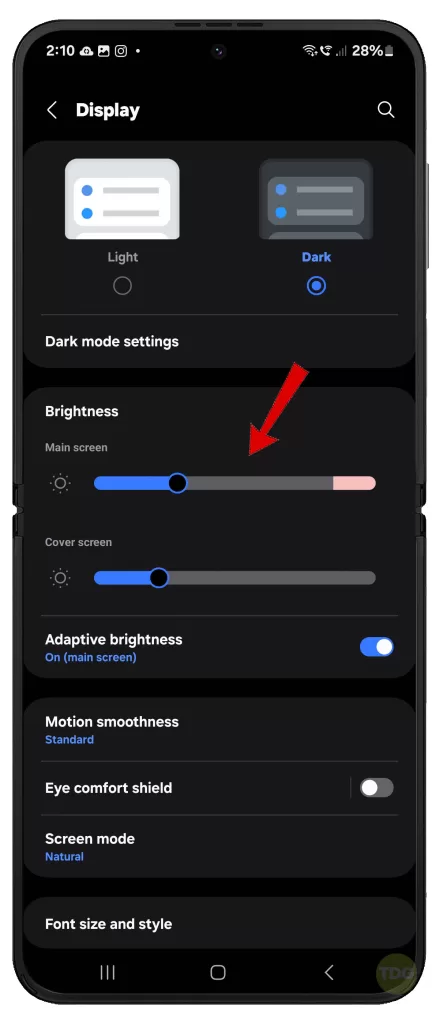
8th Solution: Adjust Brightness Settings
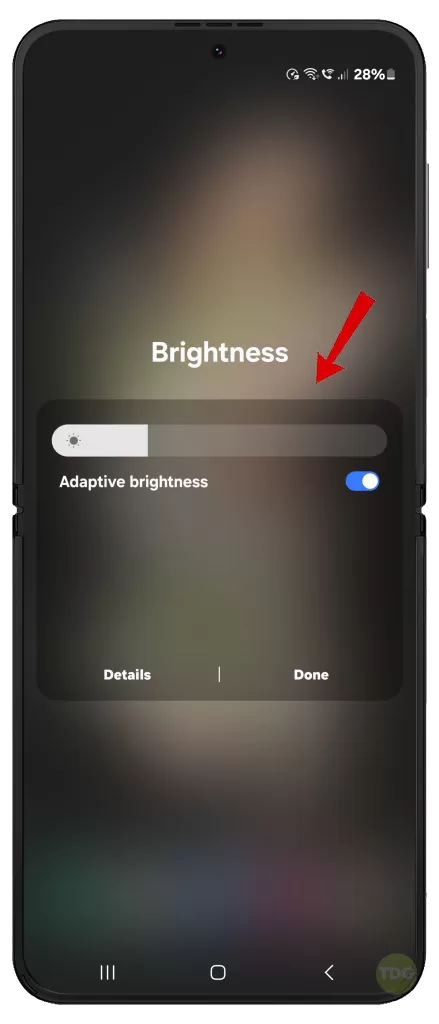
The flashlight may be on but at a very low brightness. Here’s how to adjust it:
- Open the quick settings panel by swiping down from the top of the screen.
- Locate the flashlight toggle and tap it.
- If a brightness slider appears, adjust the brightness as needed.
9th Solution: Check DND (Do Not Disturb) Mode
DND mode might restrict notifications and other functionalities, including the flashlight. Here’s how to check:
- Open the quick settings panel.
- Locate the Do Not Disturb toggle and ensure it’s disabled.
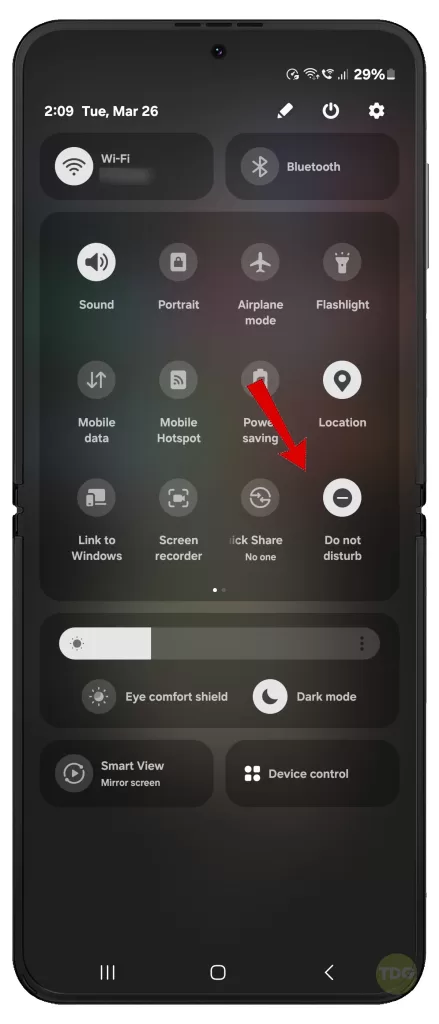
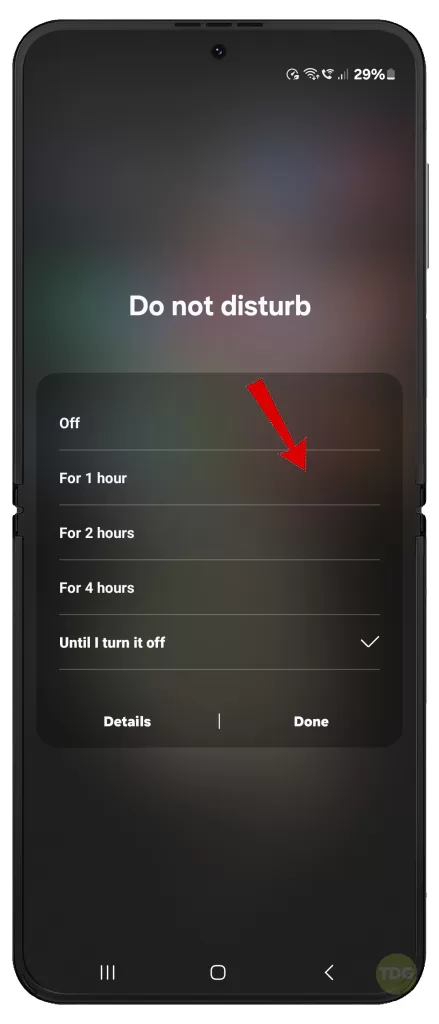
You can also access and manage DND settings like setting a schedule or set some exceptions by heading to the settings menu.
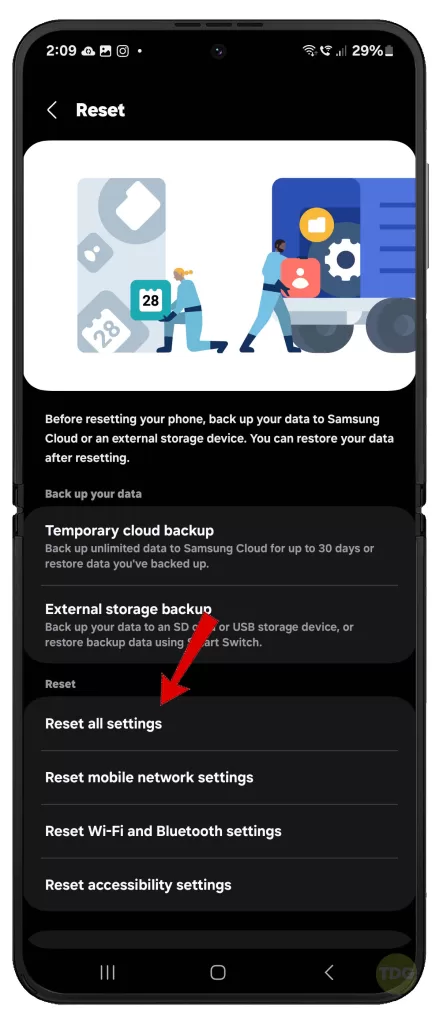
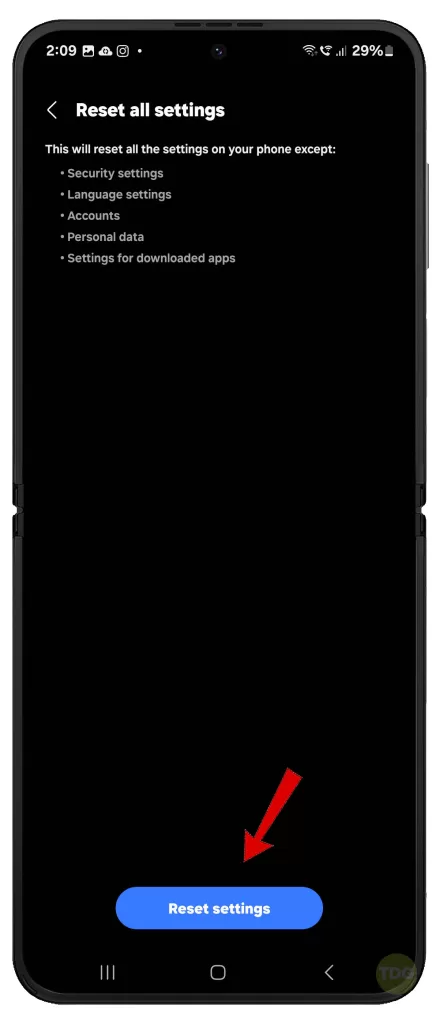
10th Solution: Reset All Settings
This will reset settings without deleting your data. Here’s how to do it:
- Open the Settings app.
- Tap General management.
- Tap Reset.
- Select Reset all settings.
- Tap Reset settings to confirm.
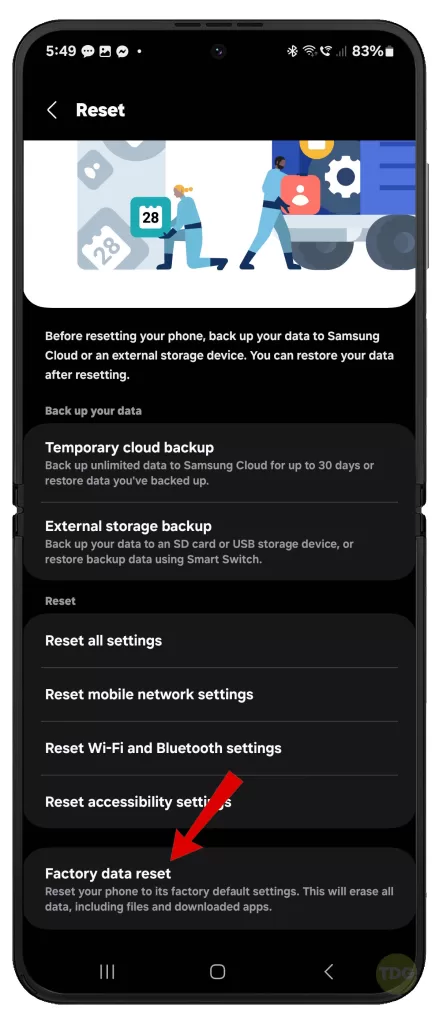
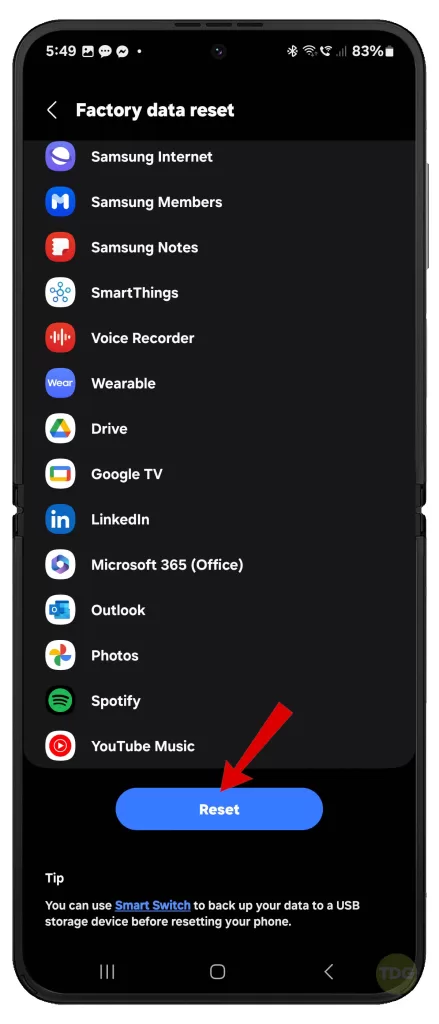
11th Solution: Factory Reset Your Device
This is a last resort, as it will erase all data on your device. Here’s how to perform a factory reset:
- Back up your important data before proceeding.
- Go to Settings > General Management > Reset > Factory data reset.
- Tap on Reset and then Delete all.
12th Solution: Use a Third-Party Flashlight App
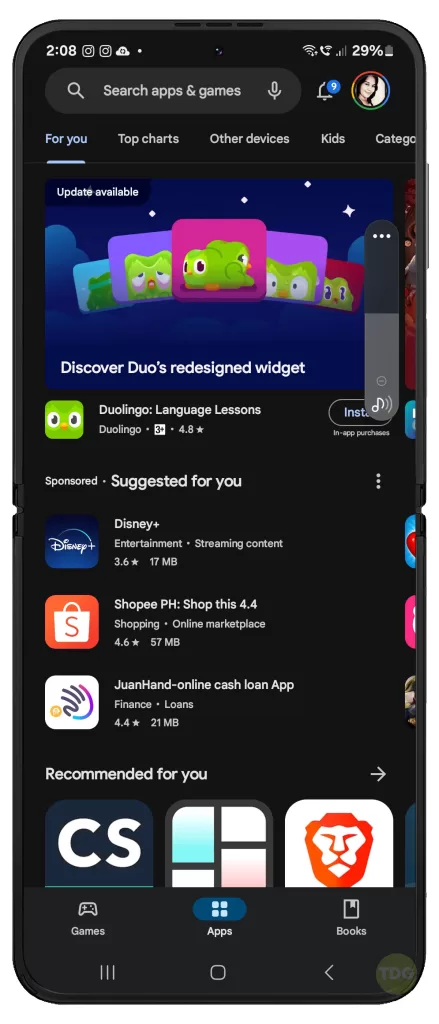
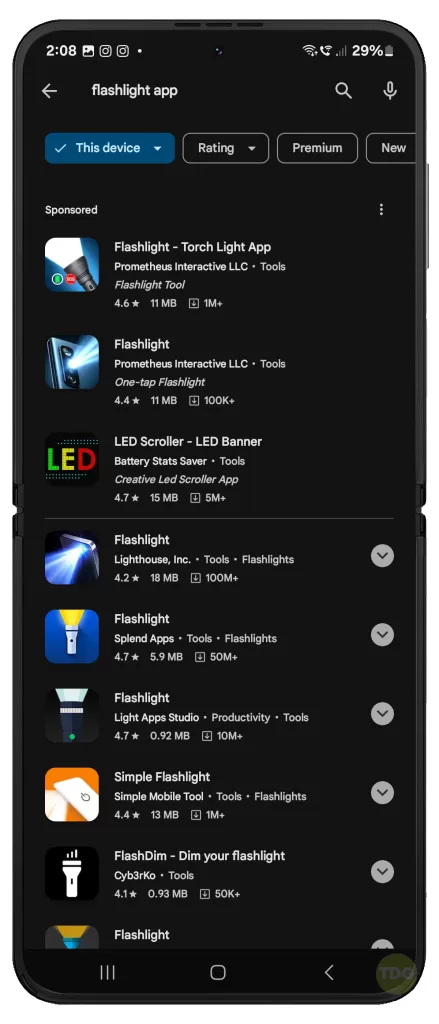
If the problem persists, try a third-party flashlight app from the Google Play Store.
- Simply head over to your Play Store account then search and install your preferred application.
When to Consider Hardware Solutions?
If you’ve tried troubleshooting steps (updates, resets, etc.) and the flashlight still doesn’t work, a deeper hardware issue might be present. This is when you should consider opting for hardware solutions.
If your device is still under warranty, contact Samsung support or an authorized repair center to explore repair options covered by your warranty.