How To Set Up Galaxy Note20
To be able to use your new phone, you need to set it up. The most important thing in this whole process, is for you to set up your Google account, so that you’ll be able to enjoy most of the services your Android device can offer.
The setup process for any Android device is easy and pretty straightforward. There are steps that you might want to skip, but don’t worry because you will be able to set them up in Settings later.
Set Up Galaxy Note20
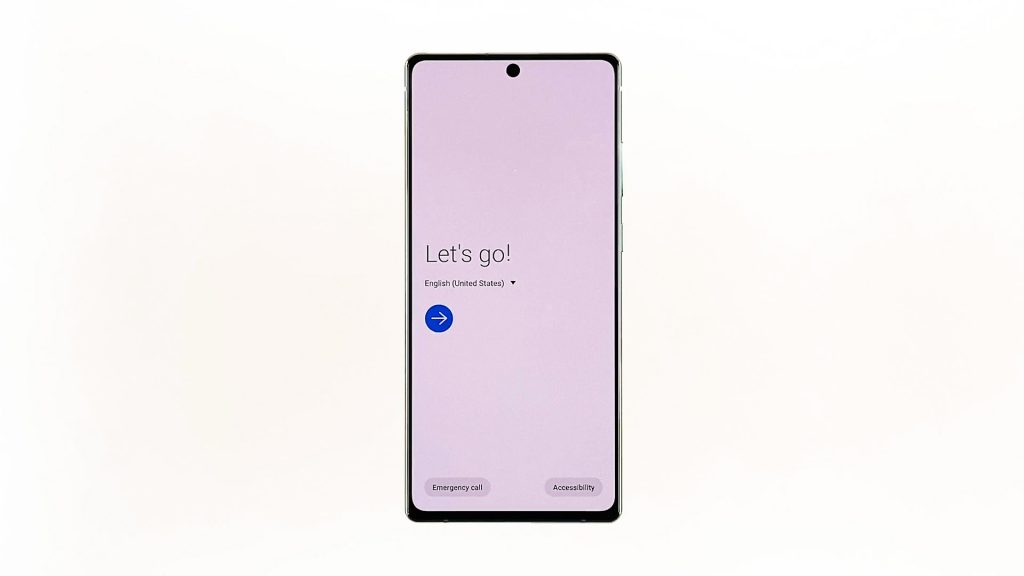
To begin the setup process, power your phone on. Most of the time, you will be brought to the setup screen where you need to choose your region. Once you’ve chosen the correct region, tap the arrow to proceed.
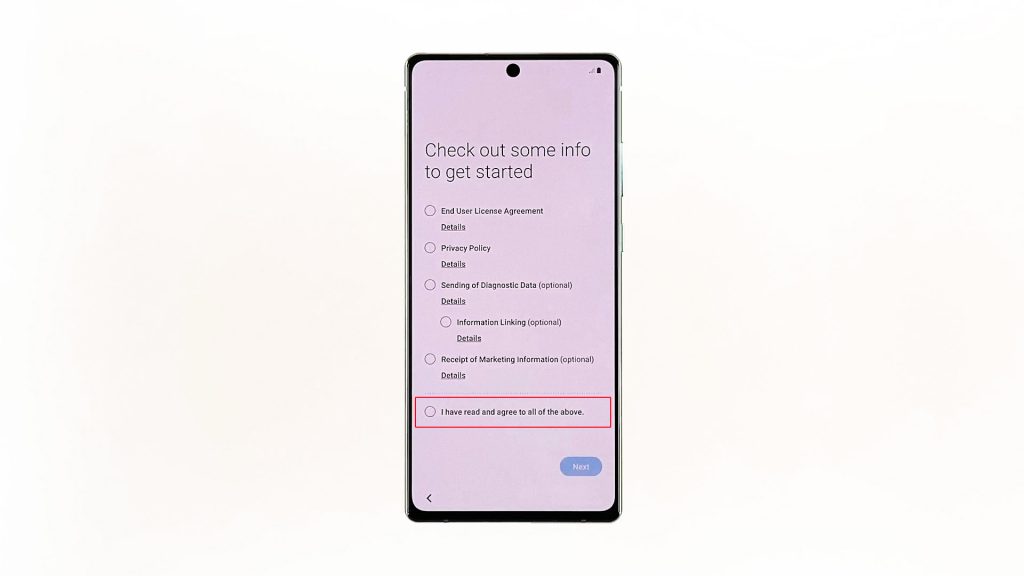
The next screen will prompt you to agree to the End User License Agreement, Privacy Policy and all other things. Just mark the radio button at the bottom to choose all of them, and then tap Next.
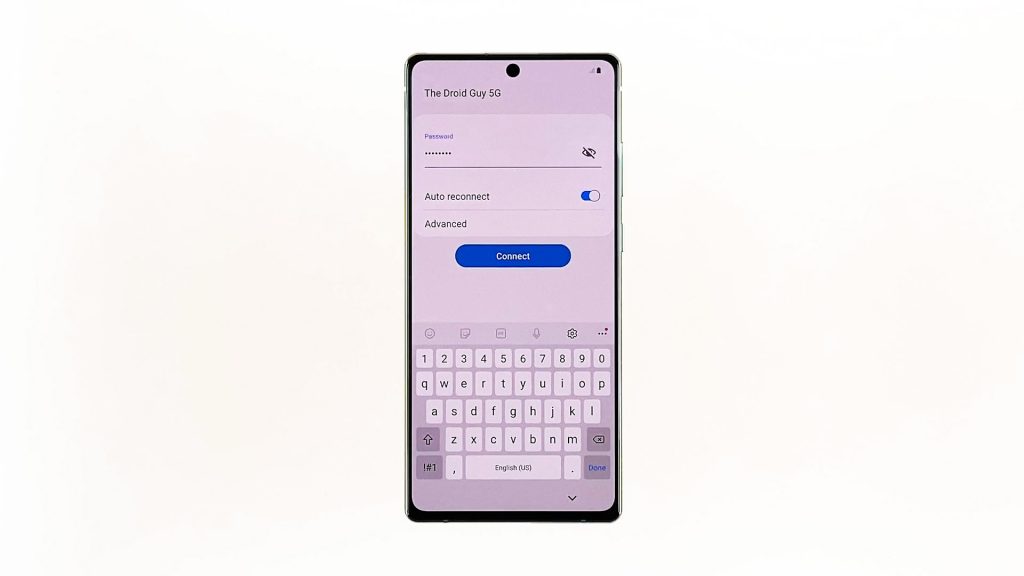
On the next screen, you will be prompted to connect your phone to the network. You may skip this step if it’s not possible for you to connect to a network, but if you can, then tap the network you want to connect to, and then enter the password. When ready, tap the Connect button to proceed.
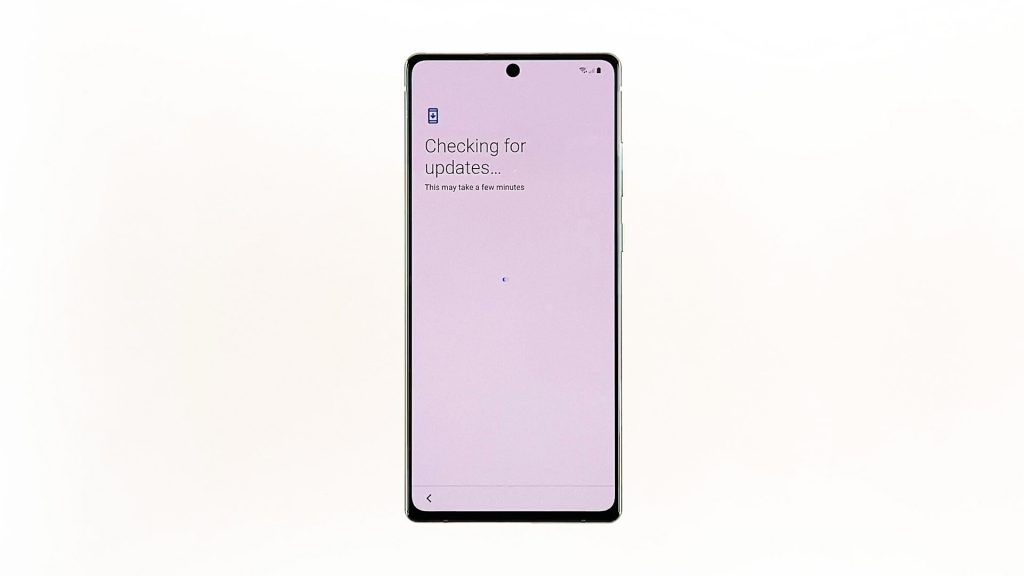
Once your phone is already connected to the Wi-Fi network, tap the Next button to continue the setup process. The device will check for updates for a few seconds, so just wait until it’s done.
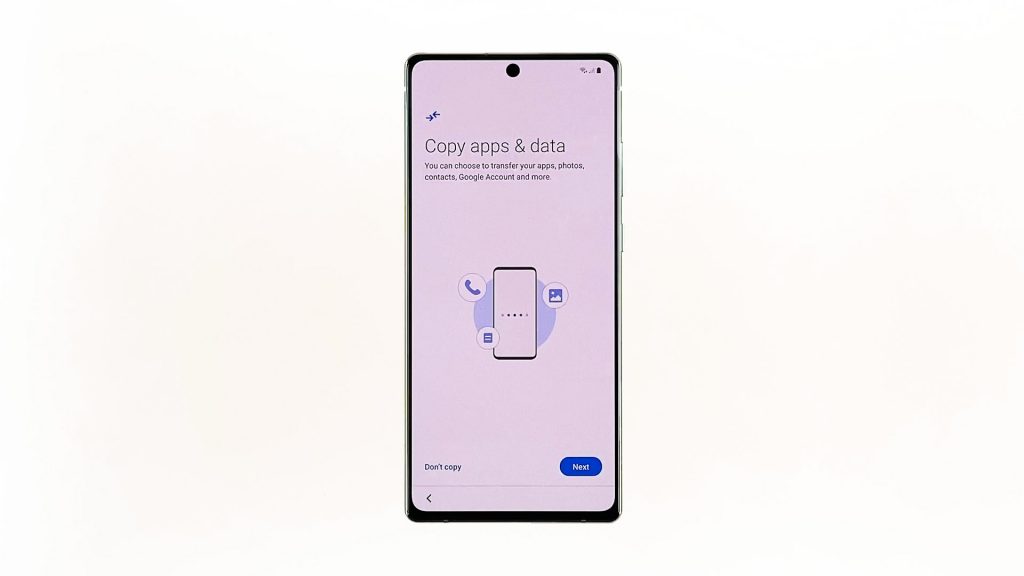
On the next screen, you will be prompted to copy apps and data. It actually gives you an option to restore your apps and data from your other device. If you want to do so, tap Next. If not, tap Don’t copy. In this tutorial, let’s choose the latter.
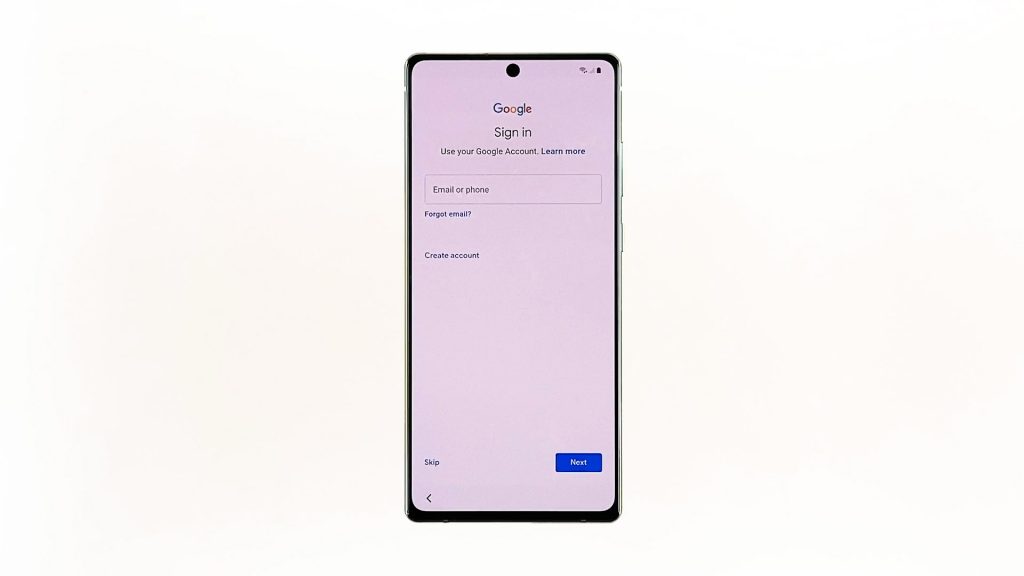
Your Galaxy Note20 will then start checking for some information. After that, it will bring you to the screen where you need to log into your Google account. Enter your Google ID, and then tap Next, and then enter your password, and tap Next. If you’ve enabled the 2-step verification, then you need to verify the login before you can proceed.
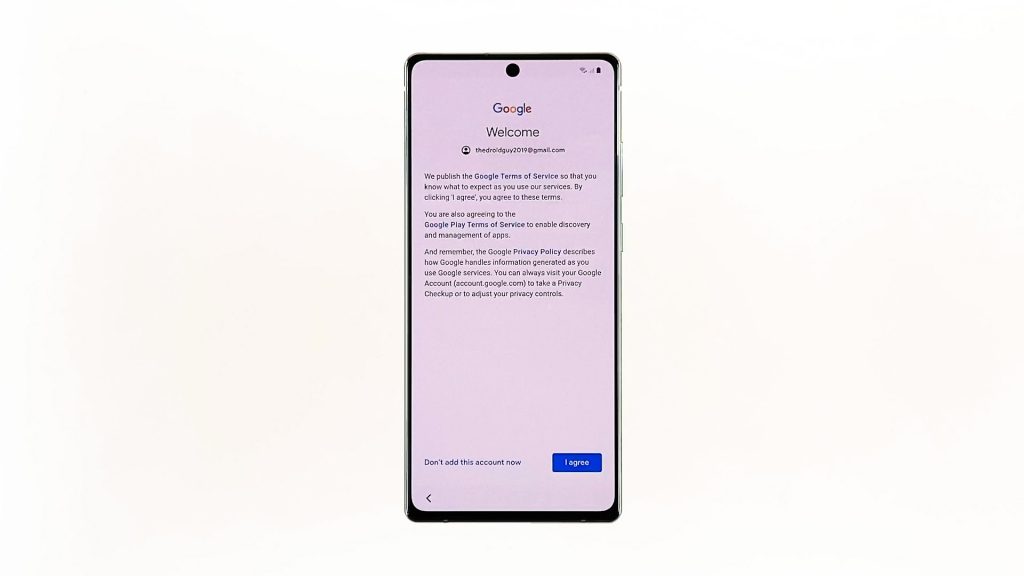
Once the login is successful, you will be prompted to add a phone number. In this tutorial, let’s just skip this part. The next step will require you to agree to Google’s terms and conditions. So tap the Agree button to proceed.
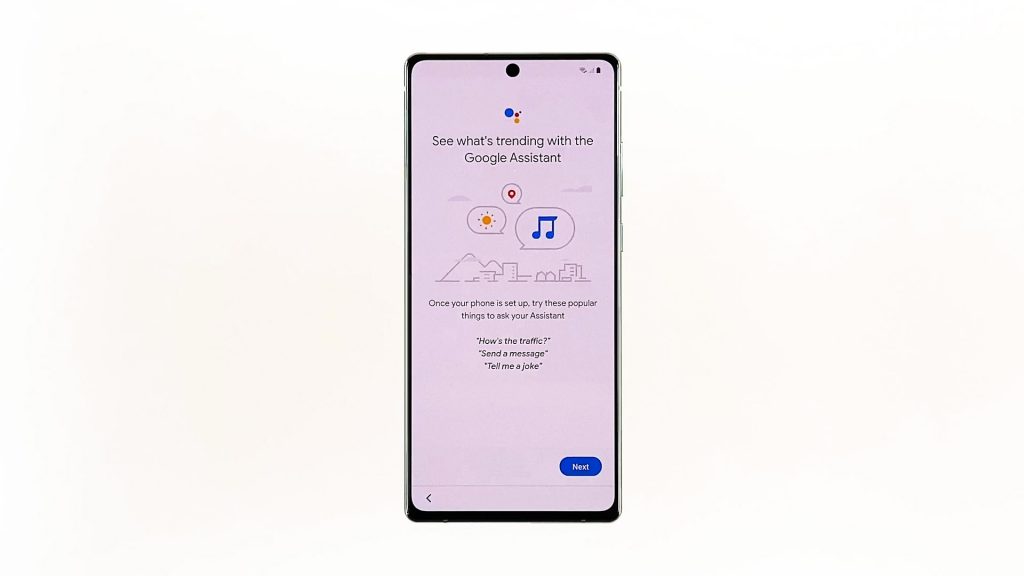
Your phone will pull up your Google account info for a few seconds, once you reach the Google Assistant screen, tap Next.
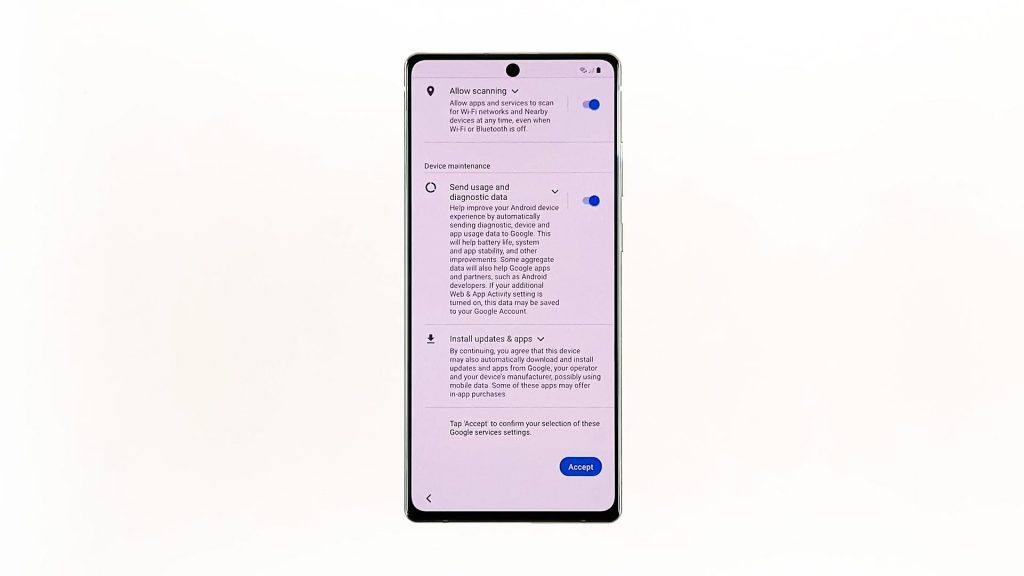
On the next screen, there will be more information about Google services. Just scroll down the bottom of the screen, and tap Accept.
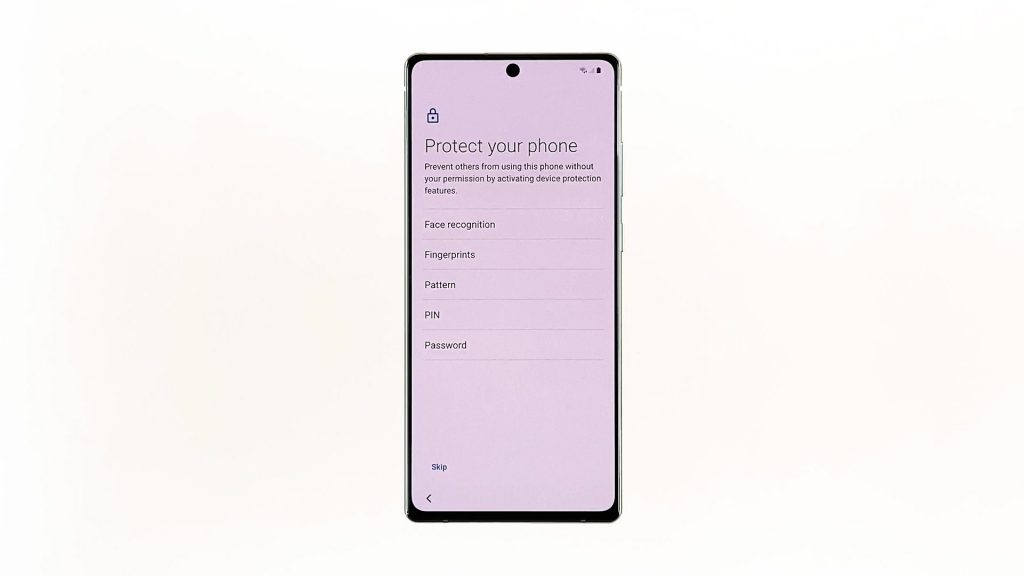
At this point, you will be prompted to choose a security lock. You may set up the method you want, but in this tutorial, let’s just skip this part as we will publish a separate video for it. So tap skip, and then tap Skip Anyway to confirm.
The next screen will allow you to choose the apps you want to download. Choose the apps that you often use, but in this tutorial, we will download all of them. Once you’ve already chosen the apps you want to download, scroll down and tap OK.
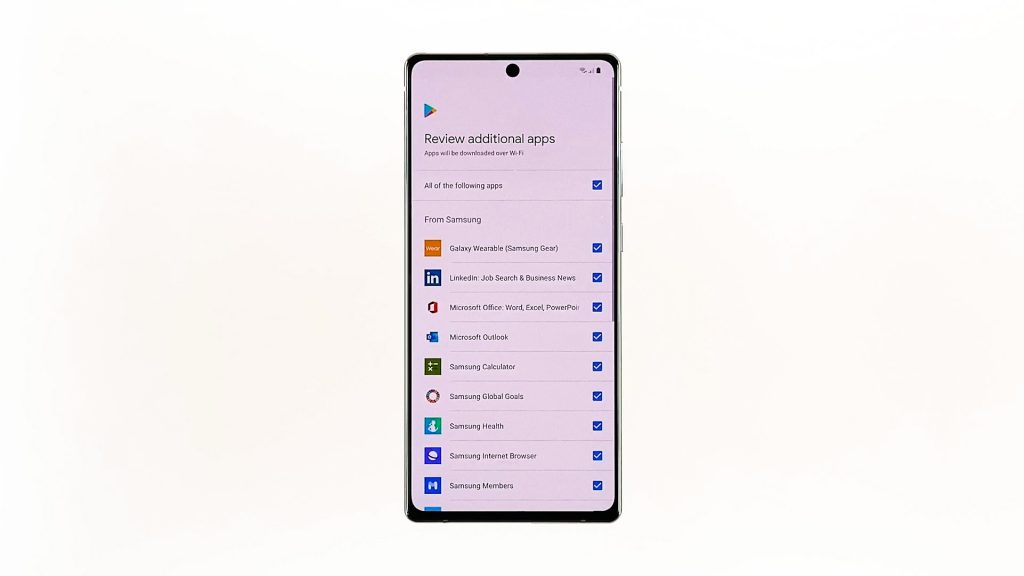
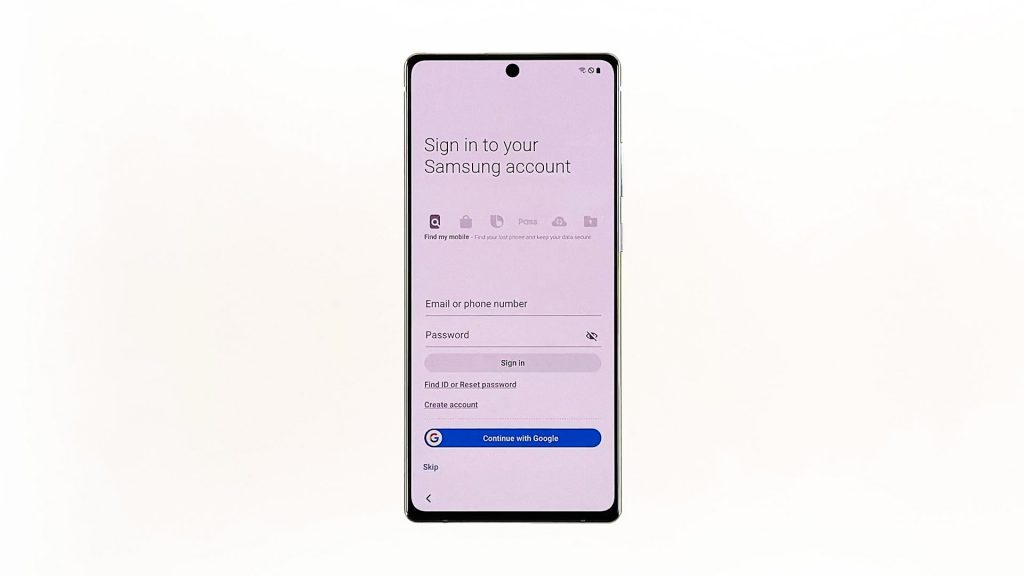
You will then be prompted if you want to download and install additional apps. If you think the apps are helpful for you, then put a check on each box and tap Next. The next screen will prompt you to sign in to your Samsung account. You may do that if you want, but in this tutorial, we will skip this step. You can add your Samsung account later in the Settings. Tap skip, and then tap Skip again to confirm.
Lastly, tap Finish.

And that’s pretty much it! Your new Galaxy Note20 is now set up. You can now use most of the services and features it offers.
Samsung Galaxy Note20 Unboxing
Some of the apps are still greyed out and unusable. But don’t worry, you’ll be able to use them later once your phone has finished downloading all of them.
I hope that this simple tutorial can help you one way or another.
Please support us by subscribing to our channel, and don’t forget to enable the notifications.