How To Fix OBS Studio Not Working In Windows 11 [Updated 2023]
If OBS isn’t working in Windows 11, you can try updating OBS, checking OBS settings, updating GPU drivers, turning off antivirus software, checking firewall settings, or reinstalling OBS. Make sure you have the latest version of OBS installed and that the right audio and video sources are selected.
Check to see if your antivirus software is interfering with OBS and if your firewall settings are blocking OBS. If files are damaged, reinstalling OBS might help fix the problem. If none of these steps work, you may need to ask for help in the OBS forums or tech enthusiast in the Discord community.
How To Fix OBS Studio Not Working In Windows 11
When trying to record or stream, it can be frustrating if your OBS isn’t working right in Windows 11. There are numerous reasons why OBS might not work in Windows 11, including old software, wrong settings, GPU drivers, and more. In this case, it’s important to follow all the solutions to resolve problems and fix the issue so that you can use OBS without any problems.
Fix #1: Restart OBS Studio
Restarting OBS studio can help fix software problems like lagging, freezing, or temporary configuration problems. When you restart the software, it re-establishes its connection to hardware devices like cameras and microphones. It also frees up any system resources that the software may have used. It can be one of the first things to try if you’re having trouble with OBS because it’s a simple fix that may fix OBS problems.
Here’s how to restart your OBS Studio:
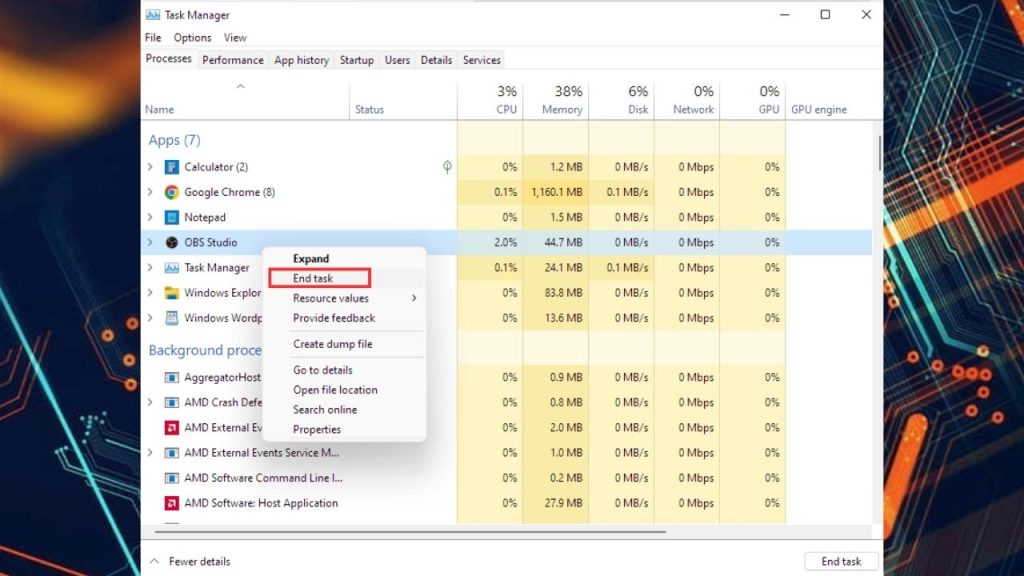
- Press CTRL+ALT+DELETE.
- Click “Task Manager.”
- Now, right-click “OBS Studio.”
- Click “End task.”
- Launch OBS Studio again.
Fix #2: Update OBS (Open Broadcaster Software)
It is necessary to update OBS studio (Open Broadcaster Software) in order to fix problems and vulnerabilities that may cause it to stop working or malfunction. OBS’s developers make updates on a regular basis that include minor bug fixes, security enhancements, and new features.
Upgrading to the latest version of OBS studio gives you access to the latest features and improvements, as well as ensuring that OBS is compatible with the most recent versions of Windows 11. Furthermore, some updates may include important security fixes to guard your system from potential vulnerabilities, so keeping your software up to date is always a smart idea.
Here’s how to update your OBS Studio:
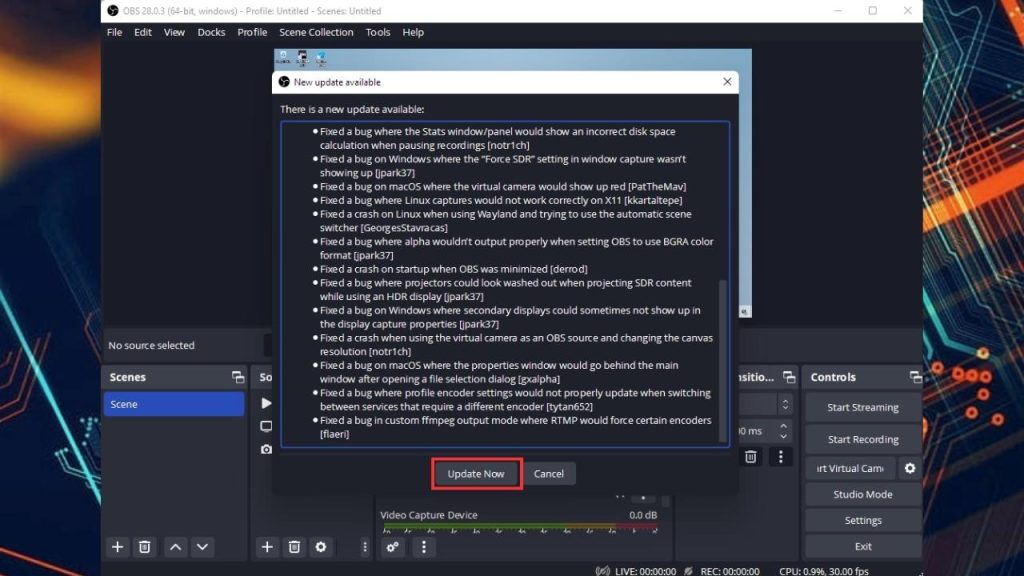
- Run OBS Studio or click the OBS studio icon.
- Click the “Help” tab.
- Click “Check For Updates”.
- Review the Updates.
- Click “Update Now”.
Fix #3: Check for Windows Update
It’s important to check for Windows updates because that makes sure your computer has the latest security patches, bug fixes, and feature updates from Microsoft. By updating your operating system, you can make your computer more stable and fast and fix compatibility problems with other programs like OBS.
Windows updates also fix known security holes, which can help keep malware and other cyber threats away from your computer. So, it’s important to check for and install Windows updates on a regular basis to make sure your computer runs smoothly and safely.
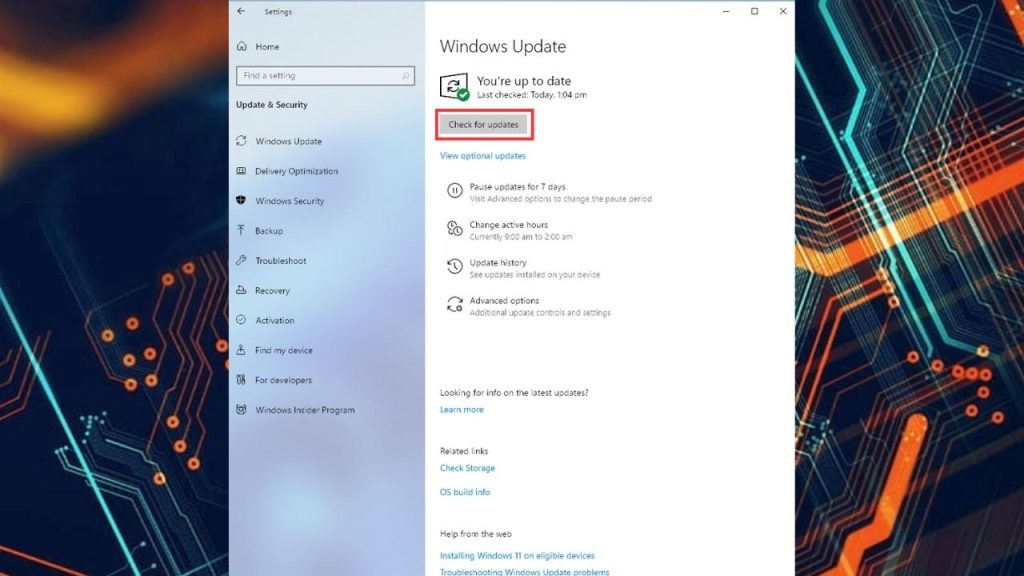
Here’s how to update your Windows 11 computer:
- Open Settings menu or click the Start menu button and click the Windows Settings app.
- Find and click Update & Security.
- Click the “Check for Updates” button to install the latest windows version.
- Now, launch OBS Studio.
Fix #4: Update your GPU Drivers/Graphics Drivers
Updating your GPU (Graphics Processing Unit) drivers can make your computer’s graphics work better and may also fix problems with rendering graphics or playing videos. GPU drivers connect the operating system to the graphics hardware, and the manufacturer often releases new versions to fix compatibility problems or add new features.
By keeping your GPU drivers up to date, you can make sure that your graphics hardware is working at its best and that any problems with software like OBS (Open Broadcaster Software) are fixed. This can make your computer run better and give you a better experience as a user.
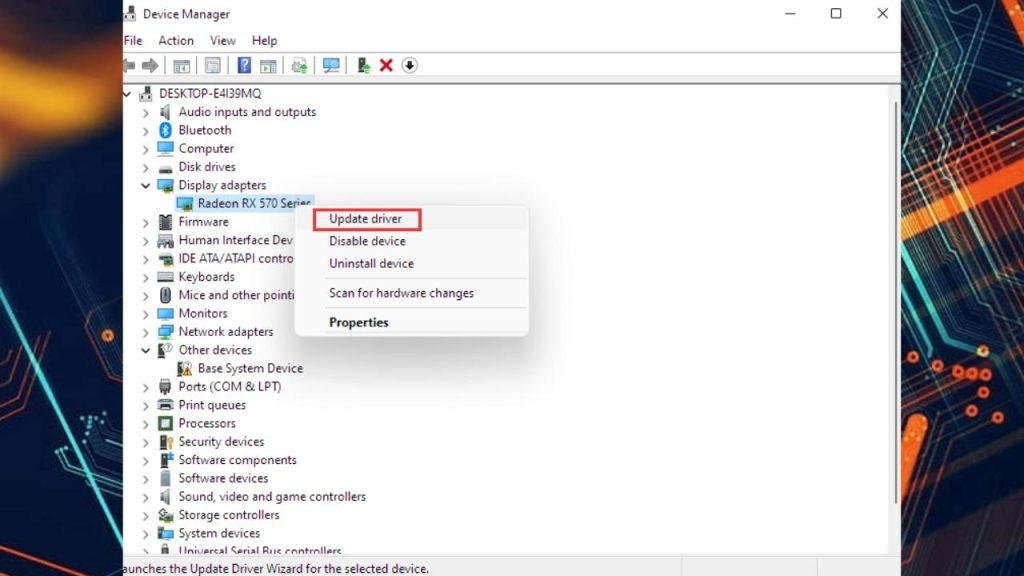
Here’s how to update your AMD Radeon driver (Windows PC)
- Simply type Device Manager in the Windows search bar on your desktop and then click the Device Manager icon that appears in the results.
- Click the Display adapters icon.
- Right-click the dedicated graphics card you are using and then select the Update driver.
Here’s how to update your Nvidia graphics card or GPU driver (Nvidia).
- From your screen, right-click and click Nvidia control panel.
- Select the “Drivers” tab.
- Click “Check for Updates.”
- Click “Download”.
- Now, choose the installation type or update option. For most users, they choose “Express Installation.”
- Wait a few minutes to finish the installation of your preferred graphics processor.
Fix #5: Disable Anti-Virus
When troubleshooting OBS issues, it may be necessary to disable antivirus software, as antivirus systems can occasionally interfere with OBS’s ability to capture or transmit video and audio. Antivirus software may identify OBS as a potential threat, which could result in the software being disabled or its functionality being disrupted.
This may result in video or audio stuttering or lag, or the inability to capture or stream content appropriately. By temporarily disabling antivirus, you can rule out the possibility that the antivirus is interfering with OBS’s functionality and enable normal OBS operation. Nonetheless, it is necessary to re-enable antivirus after troubleshooting in order to ensure system security.
Here’s how:
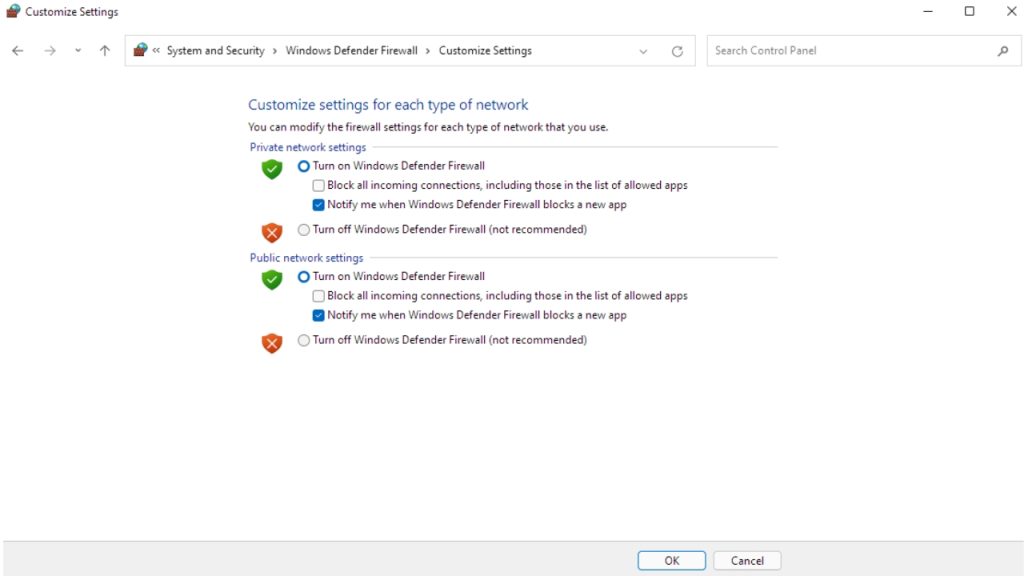
- On the search bar, type Windows Firewall.
- Click Windows Defender Firewall.
- Search for Turn Windows Defender Firewall on or off and click on it.
- Now, you can turn off your Firewall.
Fix #6: Check Firewall Settings
Checking firewall settings is necessary since the firewall serves as a security barrier between your computer and the internet and can occasionally limit the operation of certain apps, including OBS (Open Broadcaster Software). If the firewall prevents OBS from accessing the internet or getting data from specific sources, it may result in slowing, freezing, or the inability to stream video.
By verifying the firewall settings, you can ensure that OBS can communicate with the internet and other devices on your network, thereby preventing these problems. In addition, reviewing the firewall settings can assist in identifying potential security threats and mitigating them.
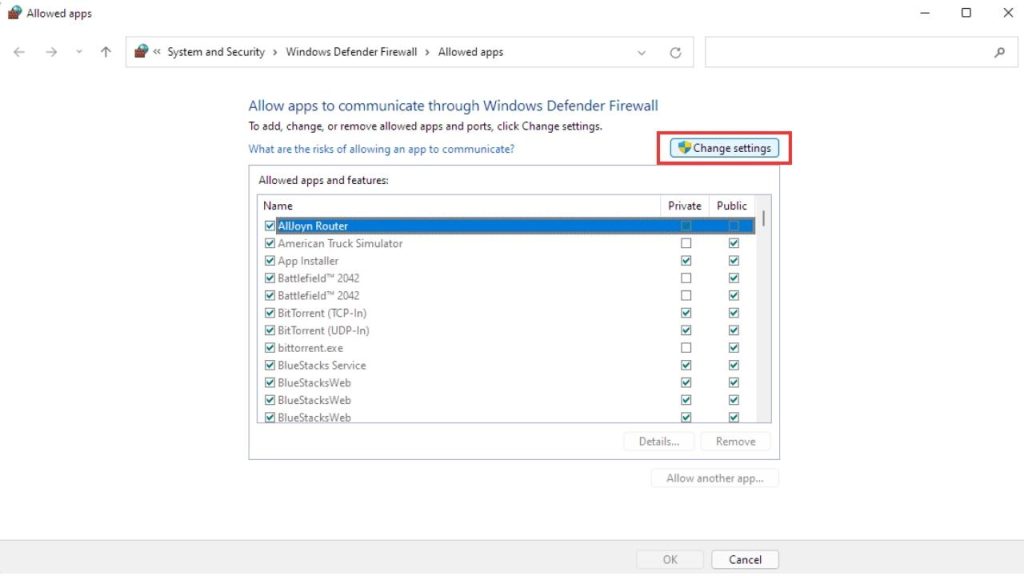
Here’s how to create Firewall rules:
- From the search bar, type “Windows Security.”
- On the left pane, look for “Firewall & network protection.”
- Click the “Allow an app through firewall” option.
- Click the “Change settings” button.
- Find OBS Studio and choose if you want to set it to “Private” or “Public.”
- Click the OK button.
- Now, run OBS Studio.
Fix #7: Run OBS Studio in Compatibility mode
When OBS (Open Broadcaster Software) doesn’t work right on Windows 11, you can run it in compatibility mode. Compatibility mode lets the software run in a way that is compatible with an older version of the Windows operating system.
This can help fix compatibility problems that may be causing OBS to stop working. This is helpful if the software isn’t working right or if Windows 11 doesn’t have a certain feature or function.
Here’s how to run the OBS Studio in compatibility mode:
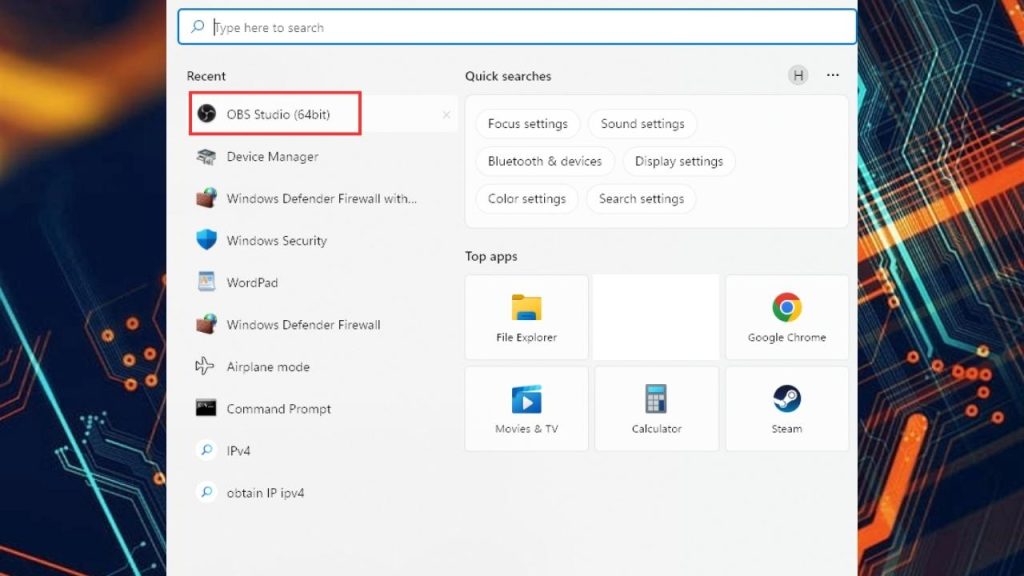
- Click the Search bar and type OBS Studio.
- Right-click on the app and click “Open file location.”
- Find the app and right-click on the OBS Studio shortcut.
- Click Properties.
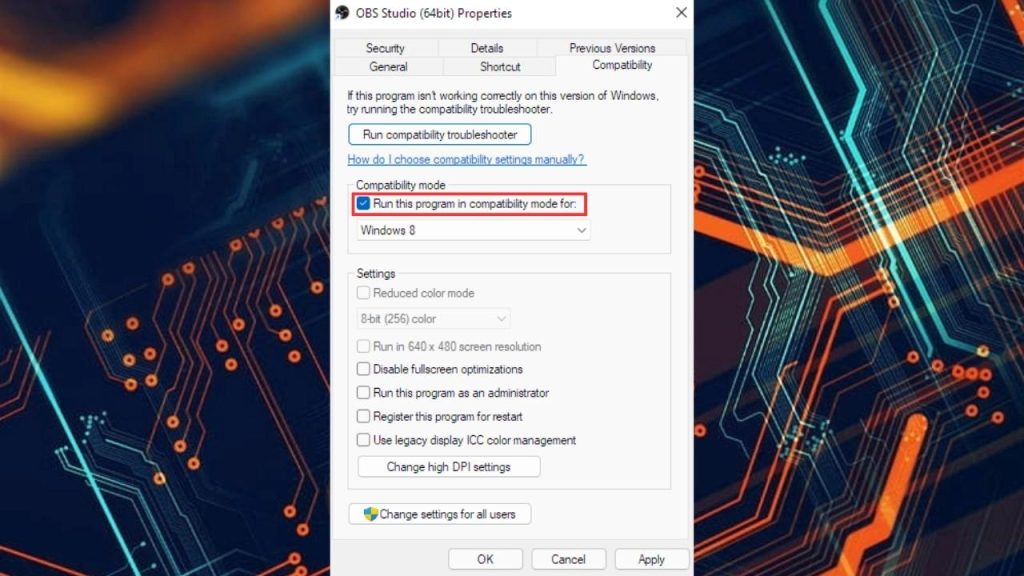
- From the Properties window, Click the Compatibility tab.
- Click Run this program in compatibility mode for.
- Now,choose the system version of Windows that you know the app is designed for or worked in.
- Click Apply.
- Click OK.
Fix #8: Run OBS as an Administrator
When you run a program as an administrator, it gets administrator privileges, allowing it to execute actions that may require greater permissions, such as accessing certain system files or changing system settings.
In the case of OBS (Open Broadcaster Software), running it as an administrator can help in bypassing certain restrictions or issues that may be interfering with its functionality, such as restricted access to specific files or hardware devices.
By running OBS as an administrator, you give it full access to all system resources, which can make it operate better and may also aid in troubleshooting. It is crucial to note, however, that launching OBS as an administrator should only be done when absolutely necessary, and not as a default configuration, as it may create security problems.
Here’s how you do it:
- Run the game.
- Press CTRL+ALT+DELETE.
- Click Task Manager.
- Find OBS Studio and right-click on it.
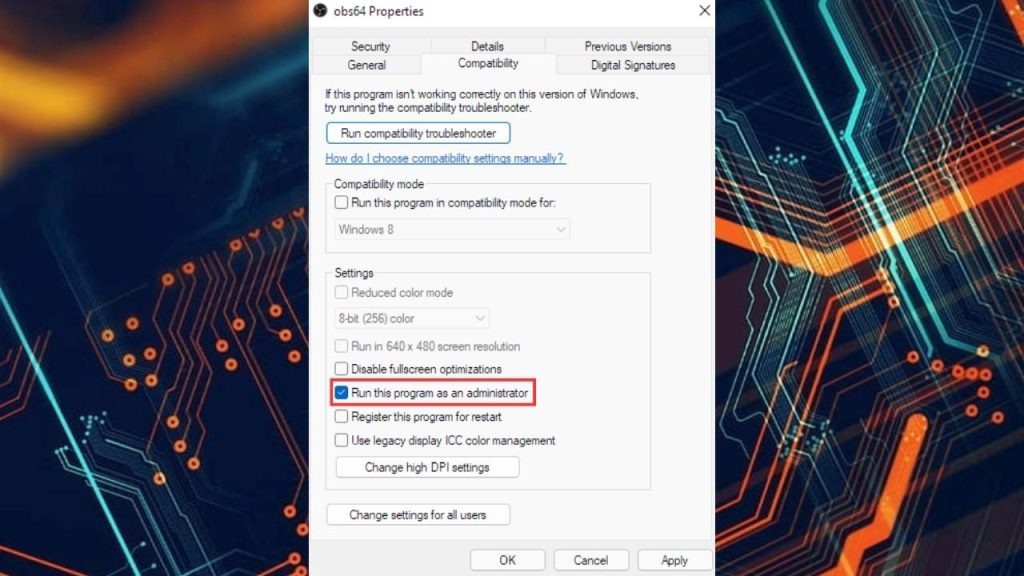
- Click Properties.
- Click the Compatibility tab.
- Click Run this program as an administrator.
- Click Apply.
- Click OK.
Fix #9: Uninstall and Reinstall OBS studio
Reinstalling OBS (Open Broadcaster Software) may be required for fixing OBS problems, as the program may be corrupted or improperly installed. OBS may be missing files or contain corrupted files, causing it to malfunction or not perform properly. In such situations, reinstalling OBS can help in resolving these issues by replacing the corrupted or missing files with new ones.
Reinstalling OBS can also help in removing any configuration settings or plugins that could be causing OBS to malfunction. It is important to remember that when you reinstall OBS, you may lose any custom settings or configurations you have created; therefore, you should back up any customized settings before reinstalling. Reinstalling OBS should only be performed as a last resort after other troubleshooting procedures have been tried, as it can be time-consuming and is not always required to resolve OBS problems.
Here’s how to uninstall OBS Studio:
- On the search bar, type OBS Studio.
- Right-click on the app and click Uninstall.
- Reinstall OBS Studio.