Skip to content

The Droid Guy

  • Android
    • Samsung
      • Samsung Galaxy S22
      • Samsung Galaxy A53 5G
    • Tablet
    • Smartwatch
      • Fitbit
    • Tutorials
      • How To
    • Smartphone Manuals
  • Gaming
    • Valorant
    • Call of Duty Warzone
    • Playstation
      • PS5
      • PS4
    • Xbox
    • Nintendo Switch
    • PC
  • Windows
    • Windows 11
    • Windows 10
  • Reviews
    • Rumors
    • VPN
  • About Us

How to Remove Google Account on Poco M3 Pro

Last Updated on: January 1, 2023 by Ronald

Selling your Poco M3 Pro or need to perform a factory reset? Hold on, you need to remove google account on Poco M3 Pro to avoid hassles and have a smoother transaction. Check out the tutorial as you read further. 

Removing the google account on your Poco M3 Pro should be a priority whenever you are giving the device to someone else. This will ensure that they will have a smoother transition in acquiring the phone. It will also secure the personal information saved in your google account. 

The same thing should be performed when you are going to factory reset the device. If you remove the google account prior to executing a factory reset, this will ditch the process of asking the google account credentials that is previously associated on the device. It means you can use a different google account upon setting up the device again after the factory reset. 

Should you need help in locating where to find the option to remove google account on Poco M3 Pro, feel free to follow the procedures that I have mapped out below. 

Steps to Remove Google Account on Poco M3 Pro: 

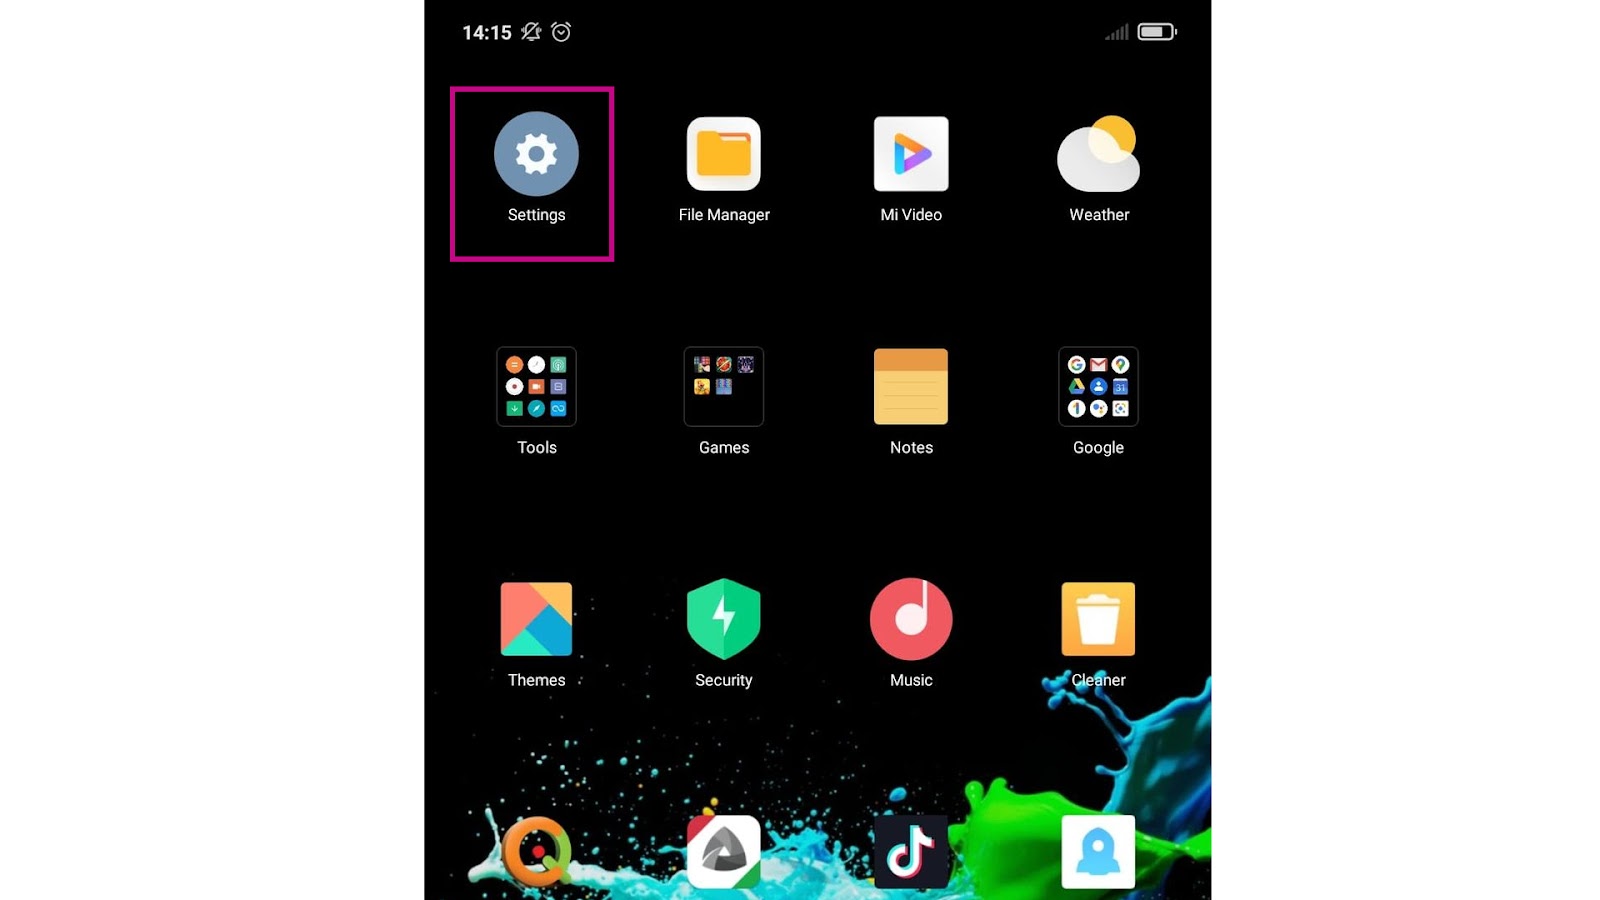
  1. Open Settings from the Main menu/app drawer. Just look for the Settings app. 
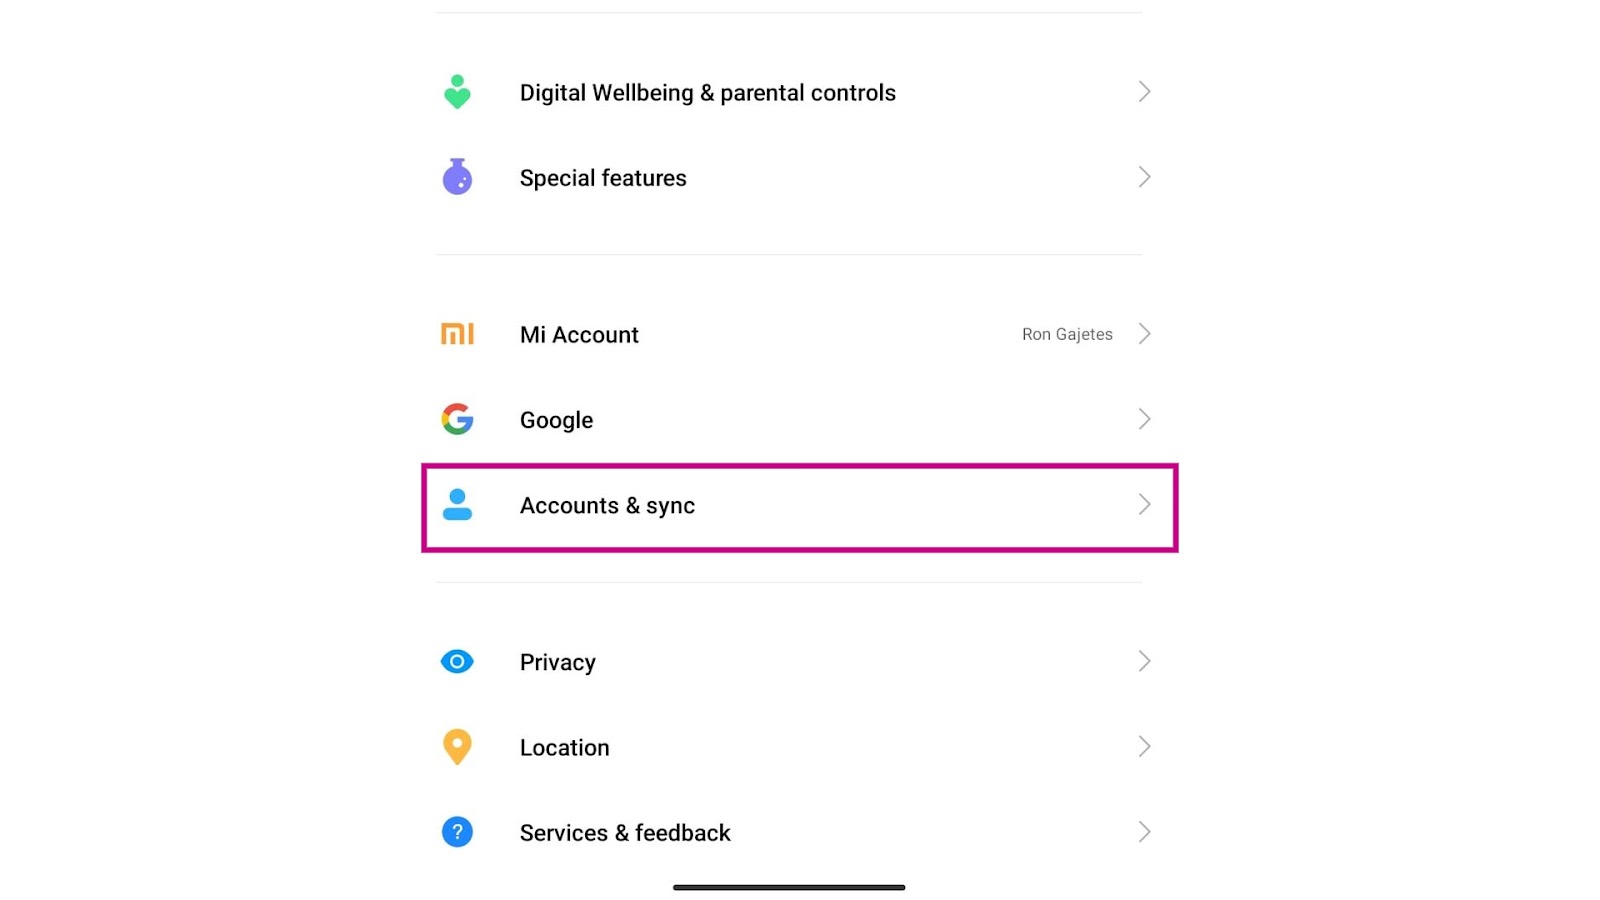
  1. Go to and tap on Accounts & sync. Scroll to the bottom part to see this option.  
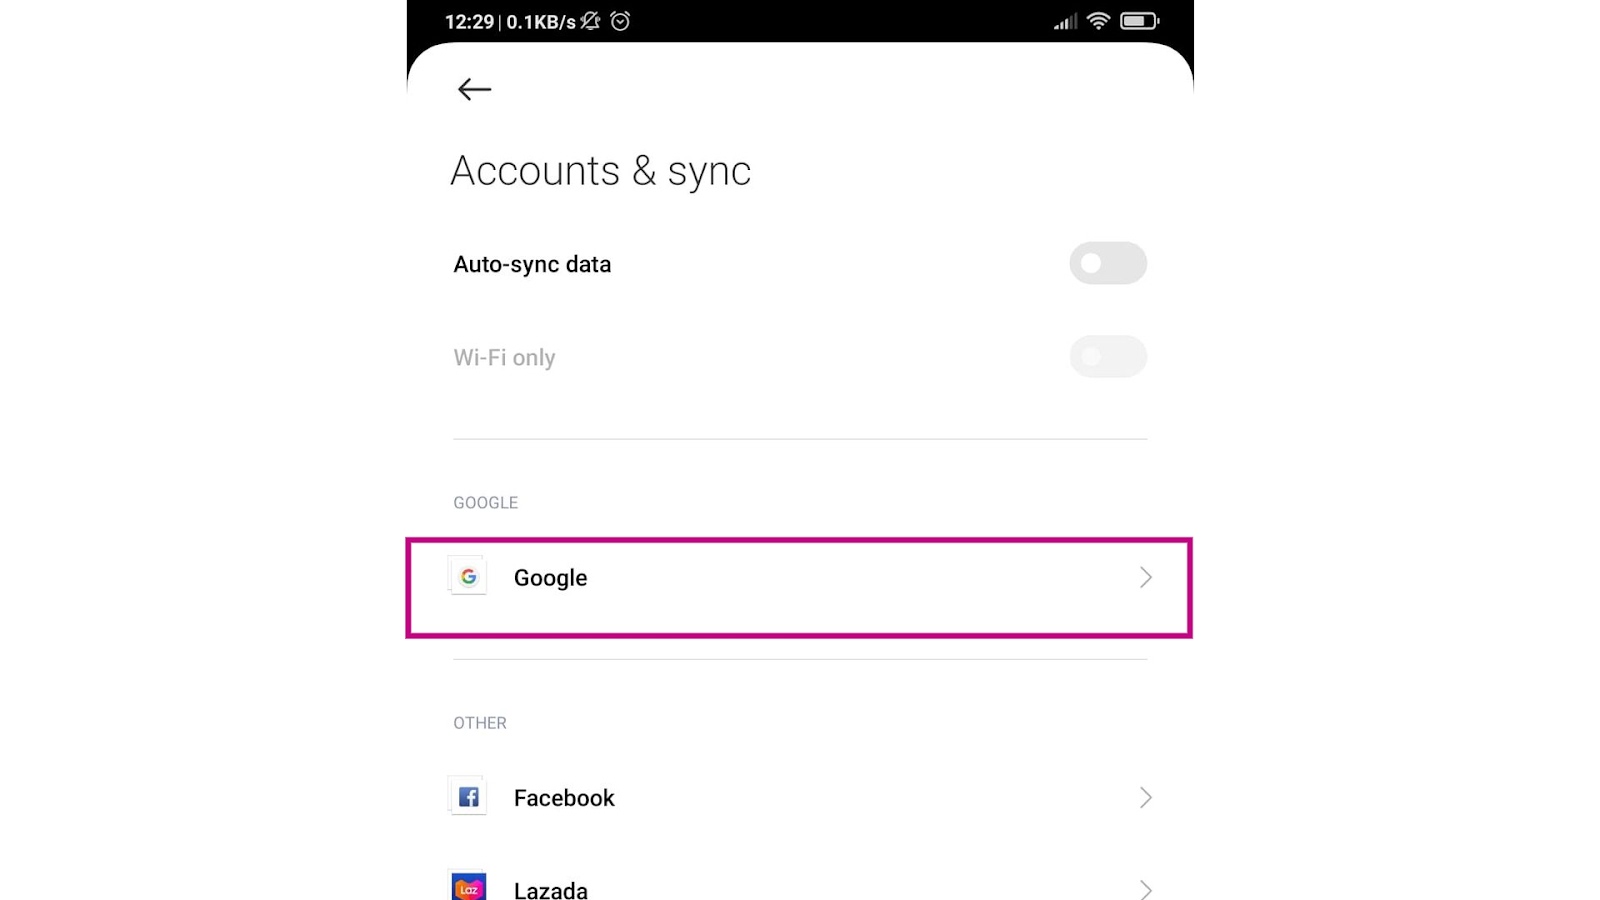
  1. Select Google. This will lead you to the Google account saved on the device. 
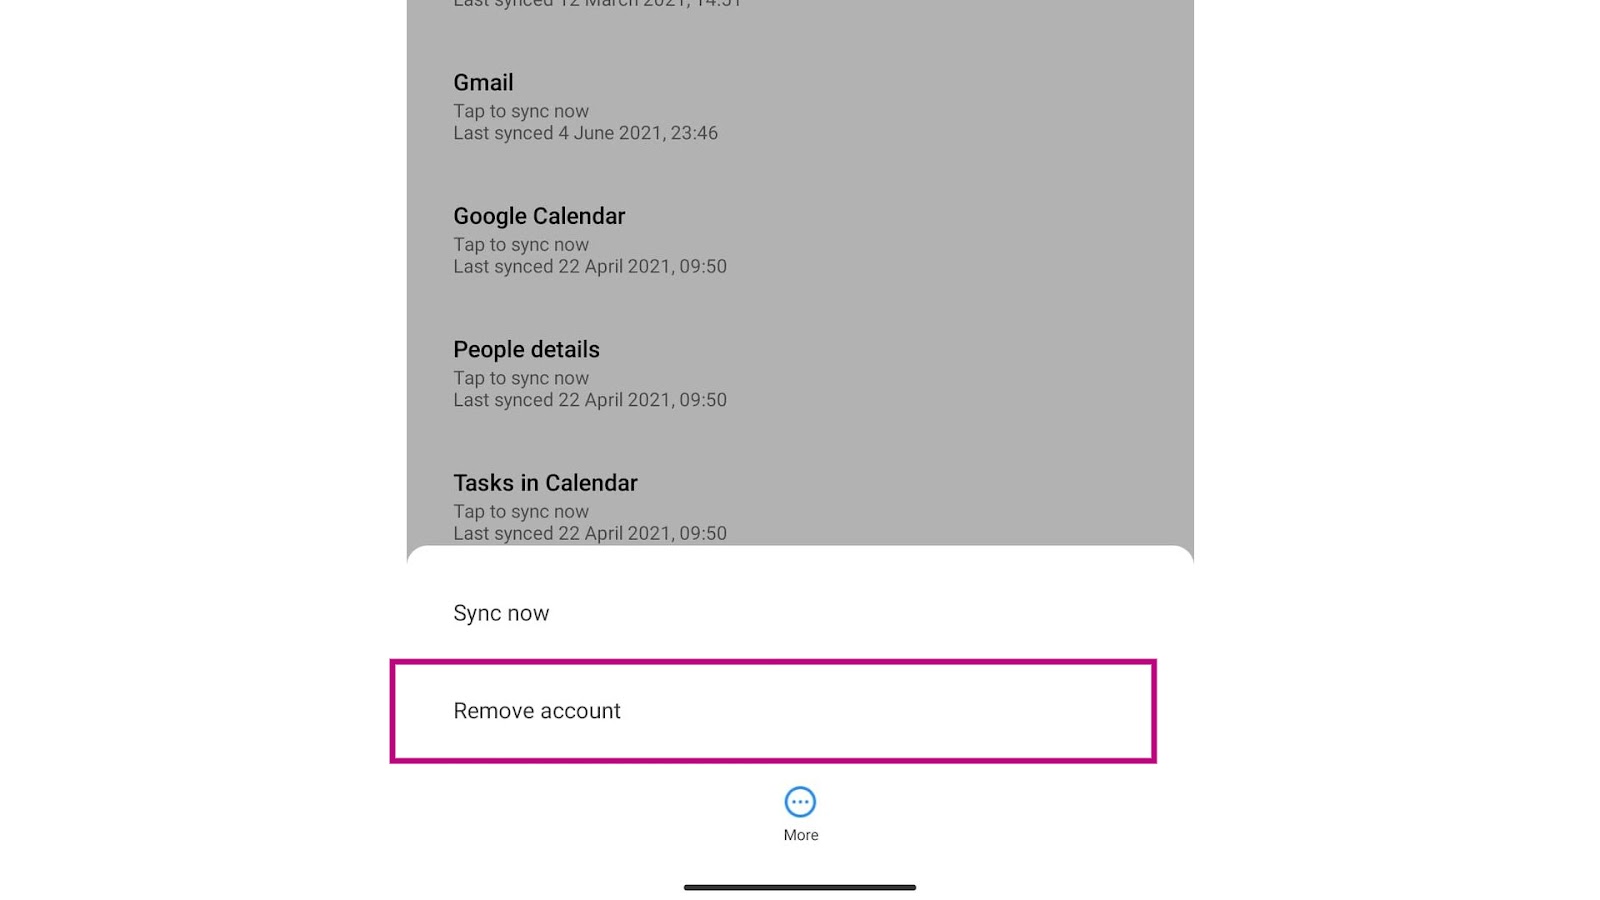
  1. Tap on More. It is the option at the bottom part. 
  1. Tap on Remove account. 
  1. Tap on Remove account again to confirm. Your phone may ask you to enter a password, if necessary. 

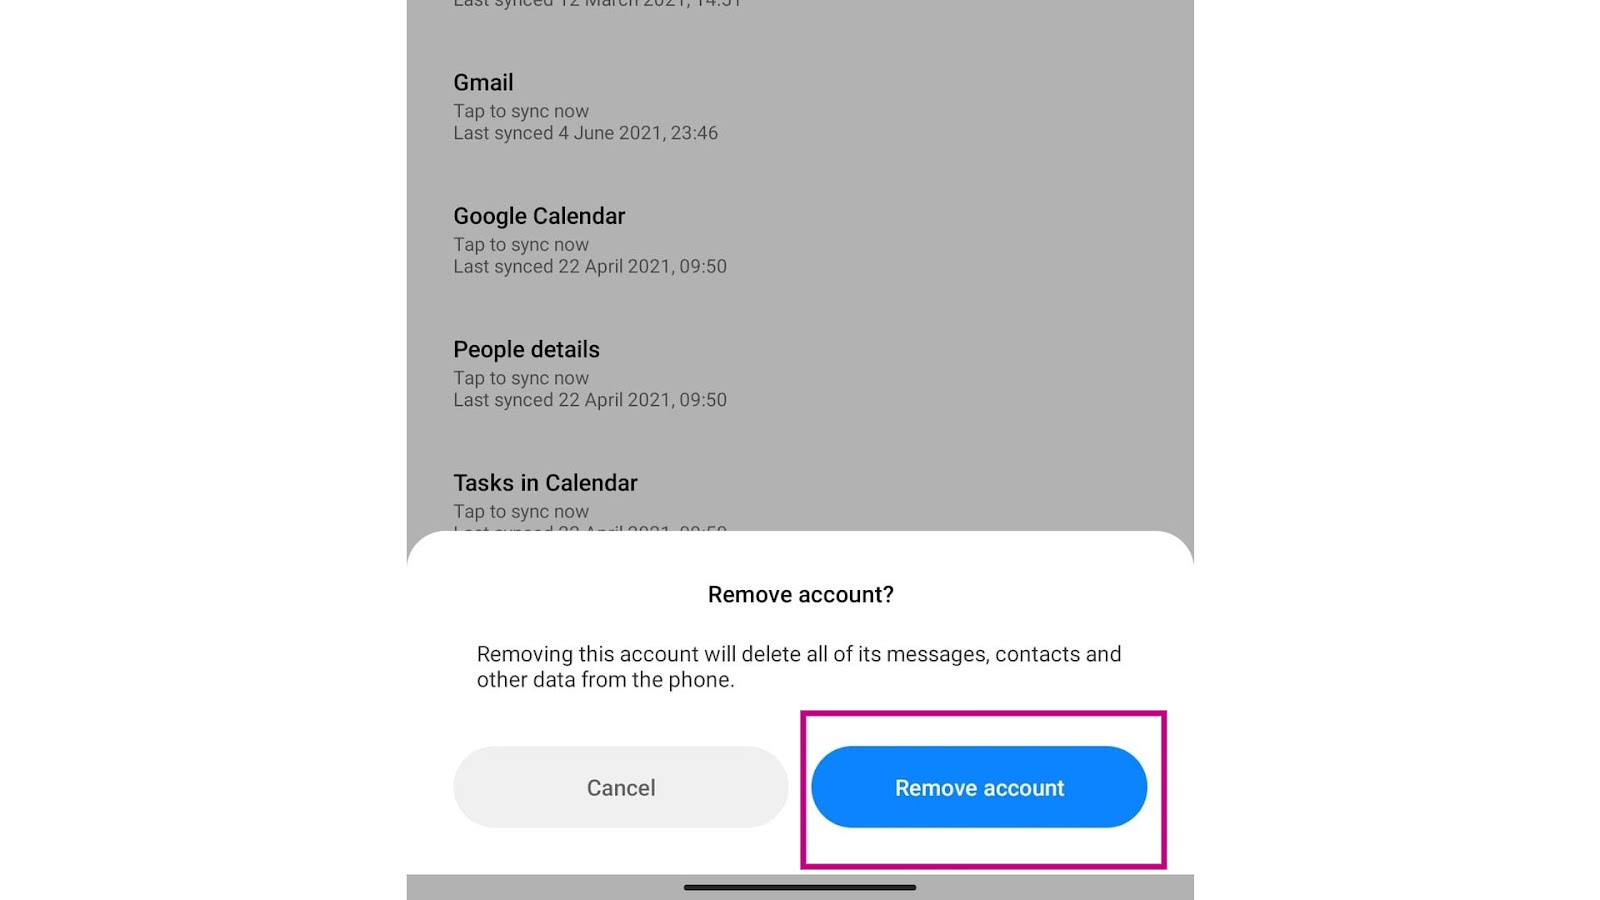
Removing the Google account will erase contacts, messages and emails linked on that certain Google account. You can always add another google account or the previously used one if you need to. This will sync data on your Poco M3 Pro from that account. 

Thank you for reading this post. If you need help with your Poco M3 Pro if it is experiencing a black screen of death or would want to know how to fix it in case it will happen in the future, just click here for more information. 

Should you need help with other things, we also have our Youtube channel for troubleshooting and tutorial videos. Feel free to visit it anytime you need help. Just don’t forget to subscribe and give our videos a thumbs up. Thank you. 

Photo of author

Ronald


Posts you might like
How To Change Carrier in Redmi Note 8
How to Register/Add New Fingerprint on Xiaomi Redmi Note 8 Pro
How to Enable and Set Up Portable Hotspot on Redmi Note 8 Pro | Internet-sharing
How to Soft Reset a Redmi Note 8
How to Reset Camera on Redmi Note 8 | Restore Camera App Defaults
How To Fix Poco M3 Pro that Won’t Download Apps via Play Store
How to Fix if Poco M3 Pro Gets Stuck on Black Screen
How to Enable App Lock on Redmi Note 8 Pro | Protect Apps with Password
How to Factory Reset Xiaomi Redmi Note 8 Pro through Settings
How to Add Fingerprint on Xiaomi Mi Note 10 Lite
How to Fix a Poco M3 Pro with Battery Draining Quickly
How To Fix Xiaomi Poco F3 Cannot Connect To Wi-Fi
How To Turn On Data Roaming in Mi Note  10 Lite
How To Turn On Data Roaming in Mi Note 10 Lite
How to Reset Accessibility Settings on Redmi Note 8
How to Enable USB Debugging on Poco M3 Pro
How to Record Screen on Poco M3 Pro
How To Enable Power Saving  Mode on Redmi Note 8
How To Enable Power Saving Mode on Redmi Note 8
How to Fix a Poco M3 Pro that Keeps Disconnecting
How to Restore Camera App Defaults on Xiaomi Redmi Note 8 Pro | Reset Camera Settings
How to Set up Gmail Account Redmi Note 8 Pro
How to Perform Hard Reset on Poco M3 Pro
How To Reset Network Settings Poco M3 Pro
How to Add/Set New Password on Redmi Note 8 Pro
How to Clear App Data on Redmi Note 8 Pro

Tags poco m3 pro, remove google account
How To Fix SteelSeries Arctis 7 Crackling Sound On Windows 10 | New in 2023
How to Fix Fortnite Error DP-06 while Downloading/Installing on Windows 10 (Epic Games)

Legal

  • Advertising Policy
  • Affiliate Disclosure
  • Privacy Policy

About Us

  • Who We Are
  • Our Team
  • Editorial Guidelines
  • Contact Us
© 2023 The Droid Guy