How To Take A Screenshot On Galaxy A53 5G
Any Samsung device has two methods that are readily available when it comes to taking screenshots and that’s what we’re going to show you in this post.
Taking a screenshot can be very helpful as it allows you to save a snapshot of something that’s shown on your phone’s screen. Fortunately, you can easily do so without going through the hassle of changing some settings on your device.
Taking Screenshots With Physical Buttons
Most of the time, it’s the Gallery app that’s assigned to open photos and images including screenshots on your phone. But Google’s Photos app can also be used to do such a job.
Taking Screenshots Using Palm Swipe
The other method that’s readily available for taking screenshots is the Palm Swipe. It’s one of the features that uses gestures to do specific tasks. By default, it’s enabled, which means you can also use it immediately if you haven’t changed its settings.
However, if it doesn’t, then you have to check on it and enable it if necessary.
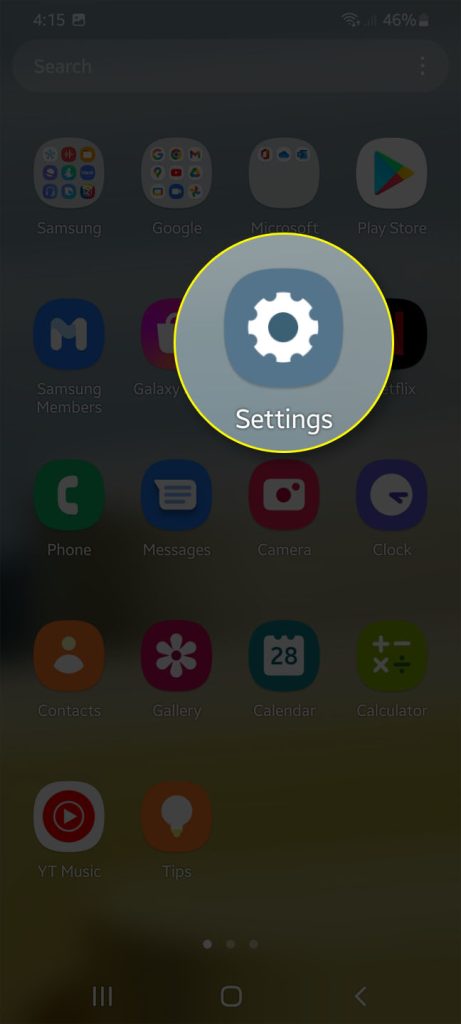
Step 1: To check the Palm swipe feature, pull up the Apps drawer and tap Settings.

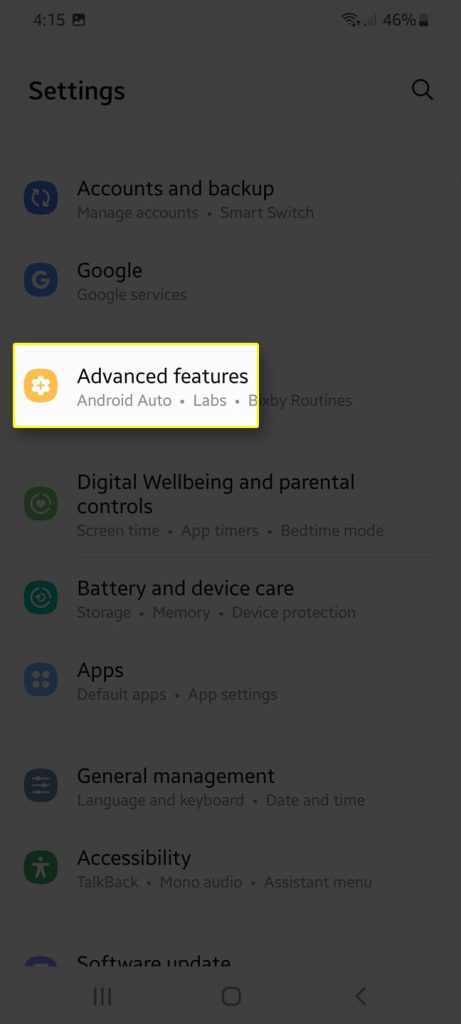
Step 2: Scroll down and tap Advanced features.

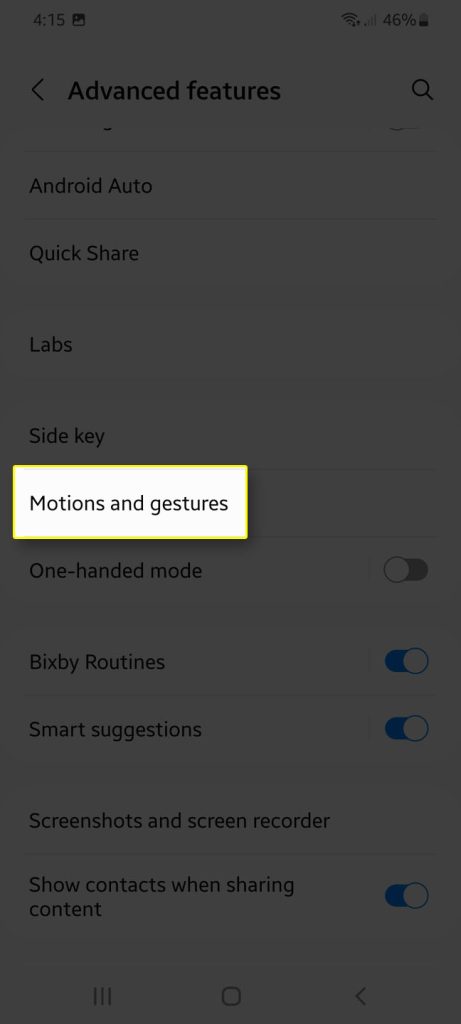
Step 3: Find and tap Motions and gestures.

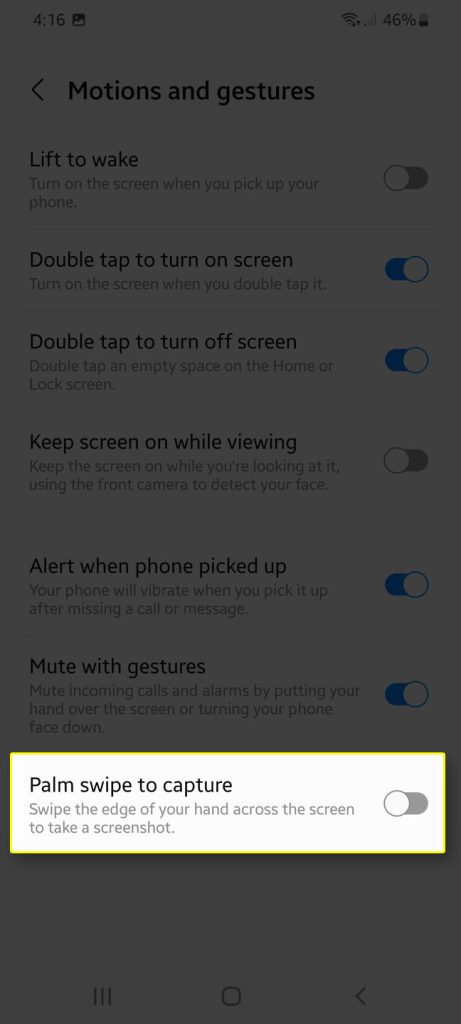
Step 4: Find Palm swipe to capture and make sure the switch next to it is enabled.

Step 5: To take a screenshot using the feature, load the content on the screen.
Step 6: Swipe the bottom edge of your hand across the screen. You can do so from left to right or vice versa.
The screen will flash and a toolbar appears as a sign that the screenshot is successful.
You can then use the Gallery or Photos to view the screenshot.
And that’s how you take a screenshot on your Samsung Galaxy A53 5G.
We hope that this tutorial can help you.