How To Fix 100% CPU Usage On Windows 10
Hey Guys! Welcome to The Droid Guy. Today, we will teach you How To Fix 100% CPU Usage on Windows 10. If you enjoy playing computer games, but are constantly having lag problems, then this post might be able to help you. Scroll down to read more if this is something that interests you.
Fix 100% CPU Usage Windows 10
Instructions on How To Fix 100% CPU Usage

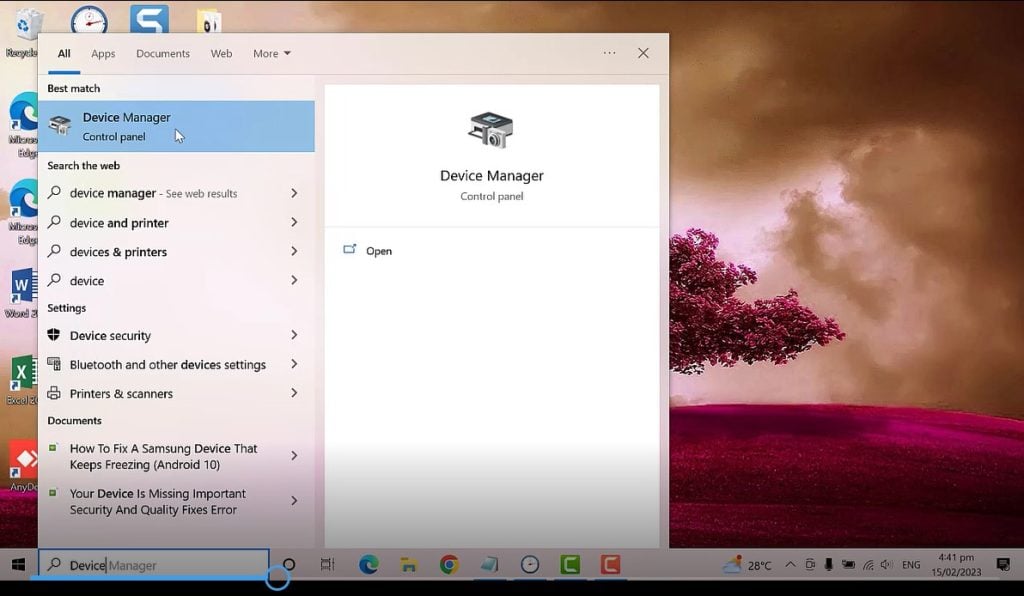
- The first thing you need to do is to click the start button. Then, find and click on Device Manager. You also have the option to type Device Manager on the search box.
- On the device manager, find and search High Precision Event timer. It is usually under the System Devices. Right click on High Precision Event timer, and select Disable Device. Then, close the window.
- Next, on the search box window, type power options. You will see edit power plan, please click on it.
- A window will open, click on Change Advanced Power Settings. On the Dropdown, select High Performance, it will be available on your end. Once you have selected High Performance, click the apply button, and then click Okay. Then, close the window.
- Now, the next step is to open the task manager. Simply type it on the search box window. Once you are on the task manager, click the Start up tab, and then sort to enabled. You can disable any unnecessary applications.
- Then, restart your computer and once again go to Task Manager. Click the Performance tab. The CPU usage will be much lower than before.
That’s it. I hope this simple steps has been able to help you.